How do you optimize your WordPress site for SEO?
In our last post, we covered the basics of SEO for membership sites, including what search engines like Google look for when crawling your pages and what it means to optimize for searcher intent. If you’re not familiar with these SEO best practices, take a few minutes to read that post first, then come on back!
In part two, we’re diving into the nitty-gritty of WordPress SEO to ensure your landing pages are Google-ready. This is by no means a comprehensive guide, but it should give you a launching point to boost your organic traffic.
We have a lot to go over, so let’s get started…
Step 1: Benchmark Your WordPress Site Metrics
The first step in the process starts with metric tracking. By setting up tracking before you optimize WordPress, you’ll be able to see and measure changes in real time and adjust your strategy on the fly.
Once your site is being tracked, the first thing you want to do is pull some metrics. The exact metrics will depend on your specific site and business goals, but as a general rule you’ll want to benchmark stats for the following:
- Page Speed
- Mobile-Friendliness
- SERP rankings (for your top keywords)
- Click-through rate (for your top keywords)
- Goal conversion rate
We highly recommend using Google Analytics to measure the bulk of your metrics. It’s free and it already knows what Google looks for in terms of SEO. If you don’t already have Google Analytics set up in WordPress, here’s a short how-to guide.
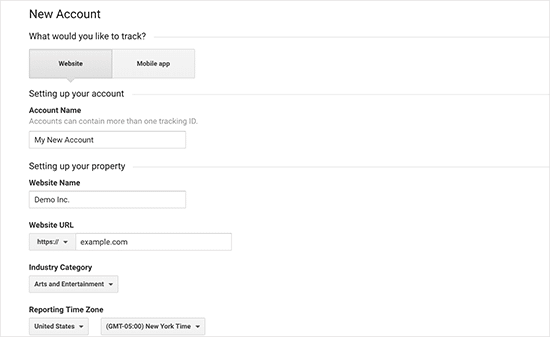
Aside from Google Analytics, there are some other tools you can use for tracking and measuring. We’ll cover some of them here, but if you want a full list of free and paid SEO tools, be sure to check out our previous post.
Page Speed
Page speed is a measurement of how fast the content on your pages load. Google has considered page speed a factor for SERP rankings since 2010, so improving your page speed is important. We’ve covered this topic before in this blog post, but we’ll go over it here too.
First, test your loading speed in person. Because your browser caches your site, you want to test with and without caching. You can disable caching in your browser settings. It’s a good idea to test it out several times using different browsers to get the average loading speed.
Then, use tools like Google Pagespeed Insights (recommended), Pingdom Tools, or GTMetrix to get a rating for your site loading speeds.

For Pagespeed Insights, a “good” score is around 85% or higher.

Gather your speed scores and put them into a spreadsheet or document so you can monitor your improvement over time.
Test your site on multiple speed tools to get a second opinion. One tool might not give you the whole picture.
Keep in mind that speed tests aren’t a perfect reflection of performance, which is why you want to use other metrics to measure SEO improvements as well. Many site speed tests bypass caching, and like we said earlier, most browsers cache sites by default.
Therefore speed tests aren’t always an accurate reflection of user experience, but rather an insight into how search engines view your page loading speeds.
Mobile-Friendliness
As we mentioned in our SEO 101 post, mobile optimization is big for Google, and all search engines, for that matter.
According to the World Advertising Research Center, nearly 1.3 billion people will use the internet via smartphone by 2025.
Beyond that, Google values mobile optimization as a key ranking factor for sites, particularly for mobile searchers. You can test your website for free using Google’s Mobile-Friendly Test. Just type in your URL and then follow any recommended steps to optimize your site.
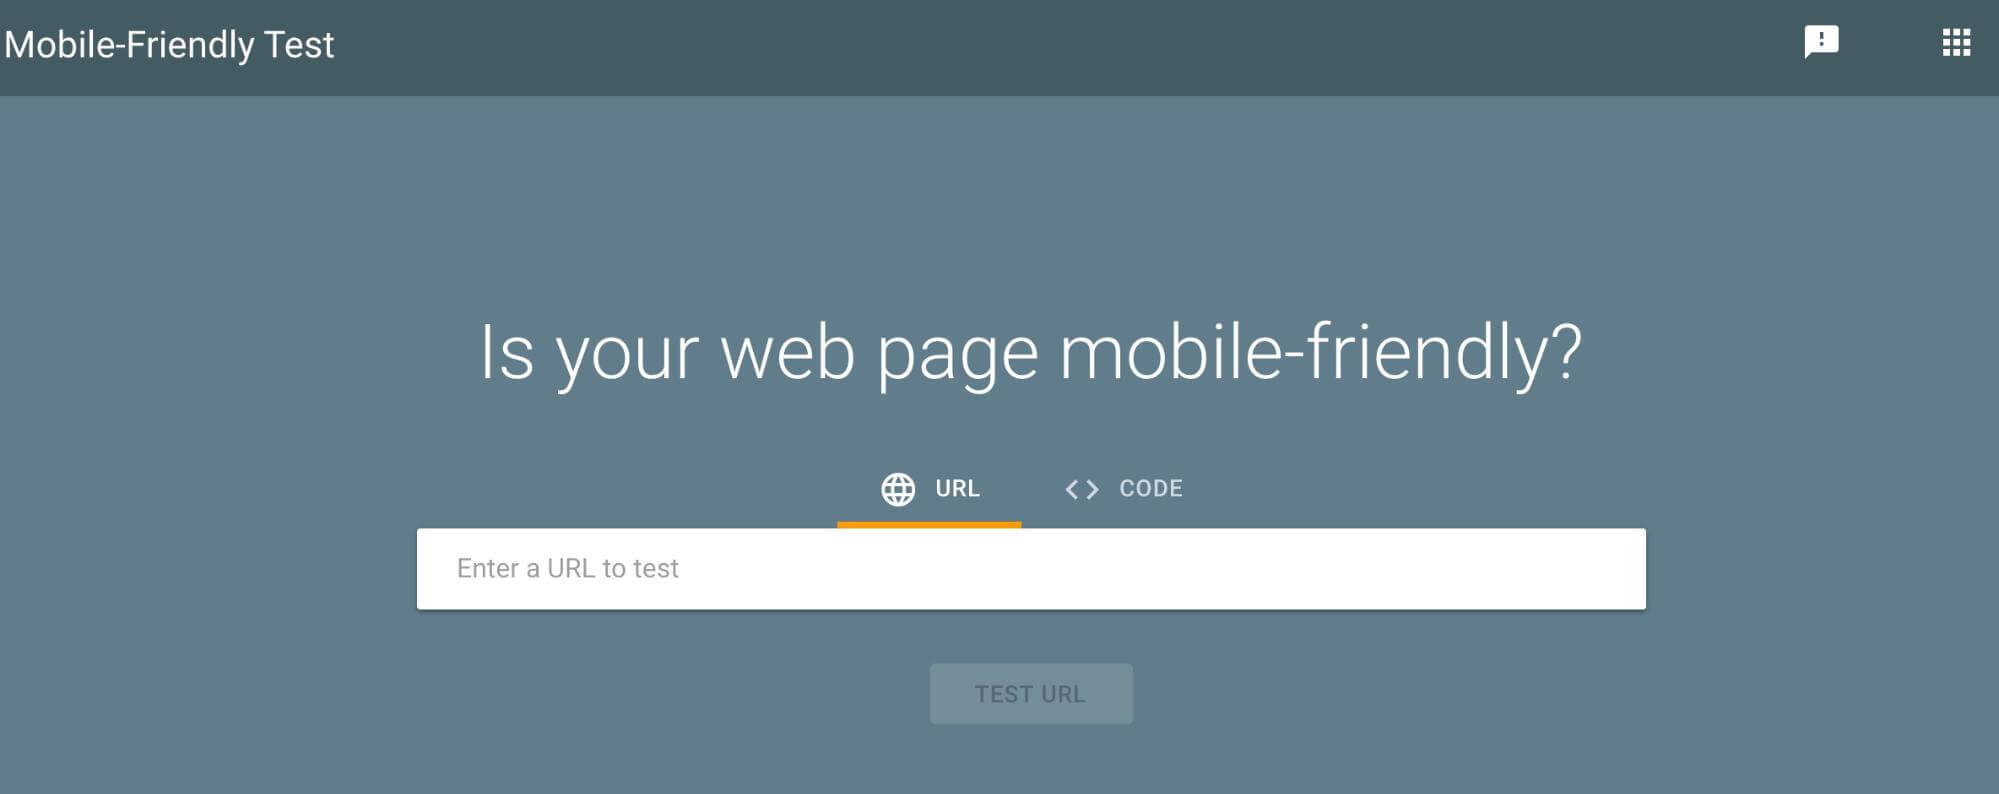
This will show any pressing issues or other impediments to achieving the “mobile-friendly” label from Google, as well as provide tips for improving your site.
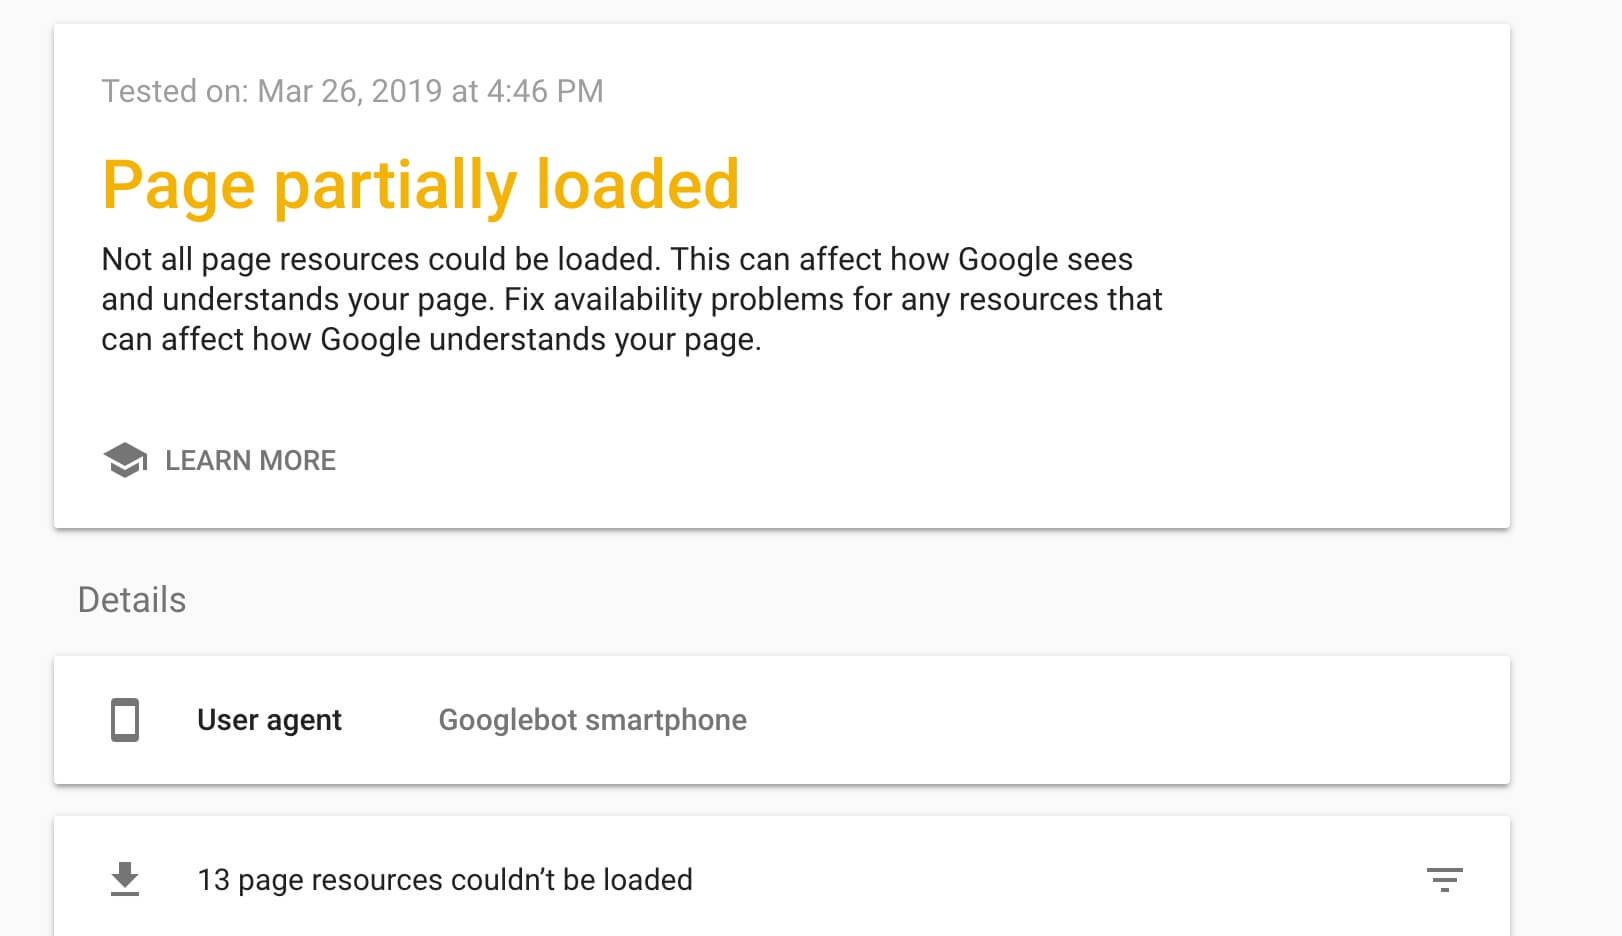
Benchmark your mobile-friendly score and take note of any recommendations provided by the testing tool. This will come in handy later (see Step 2).
SERP Rankings
The next metric you want to benchmark is your SERP ratings for your top keywords. (We covered keyword research in the last post, or you can check out Credo’s research guide here.)
Unfortunately, typing in your top keywords into Google isn’t the best way to measure your SERP results.
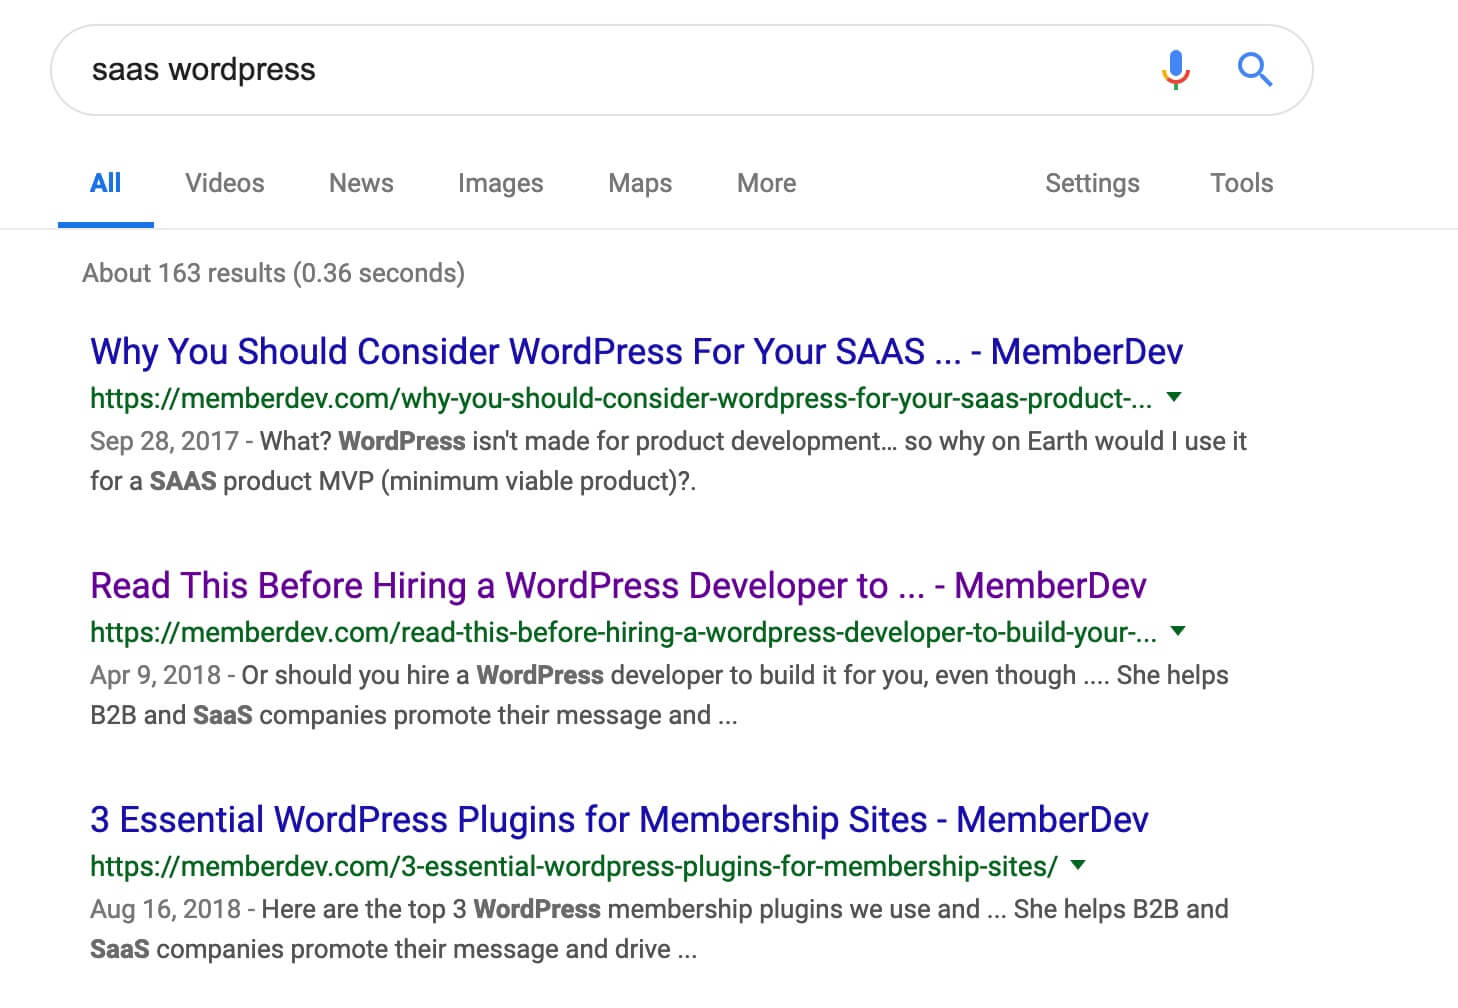
Google uses many different factors to personalize your SERPs pages, including browsing history, geographical location, and the type of device you’re using.
What’s more, Google uses your own previous searches of your site to populate your SERPs, so typing your keywords into the search bar will give you biased results — it’s not what everyone sees when searching for the same keywords.
The other important thing to keep in mind is that just because your site or landing page ranks #1 on the SERPs doesn’t mean you’ll convert that traffic to anything meaningful. Again, that’s why this is only one of a few metrics to benchmark.
So how do you track SERP results? Google Analytics.
First, make sure you have Search Console installed. This is a separate step to installing Google Analytics on your WordPress site. Here is a quick how-to guide for setting up Search Console.
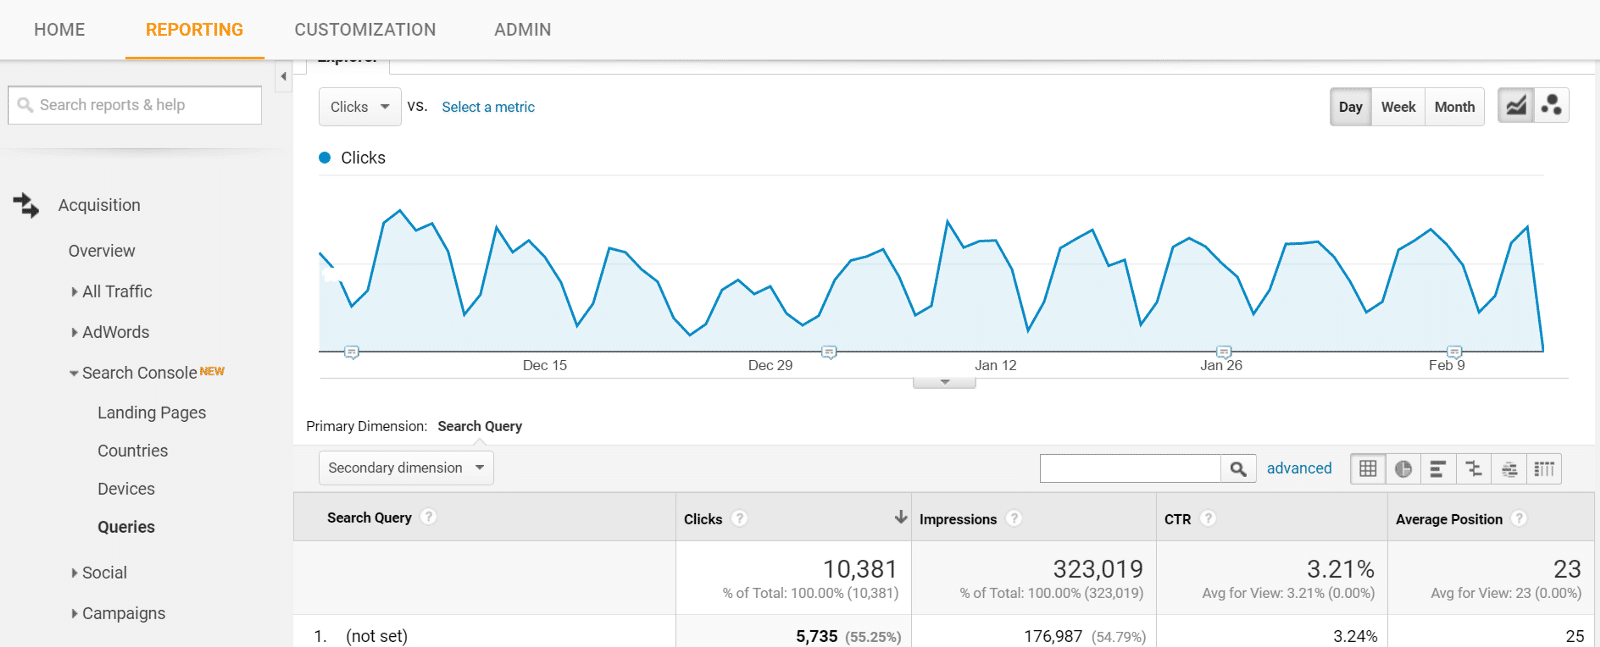
Once installed, go to Acquisition > Search Console > Queries to view your current ranking keywords. This will also show you metrics like search volume (impressions), clicks, average position in Google, and average click-through rate.
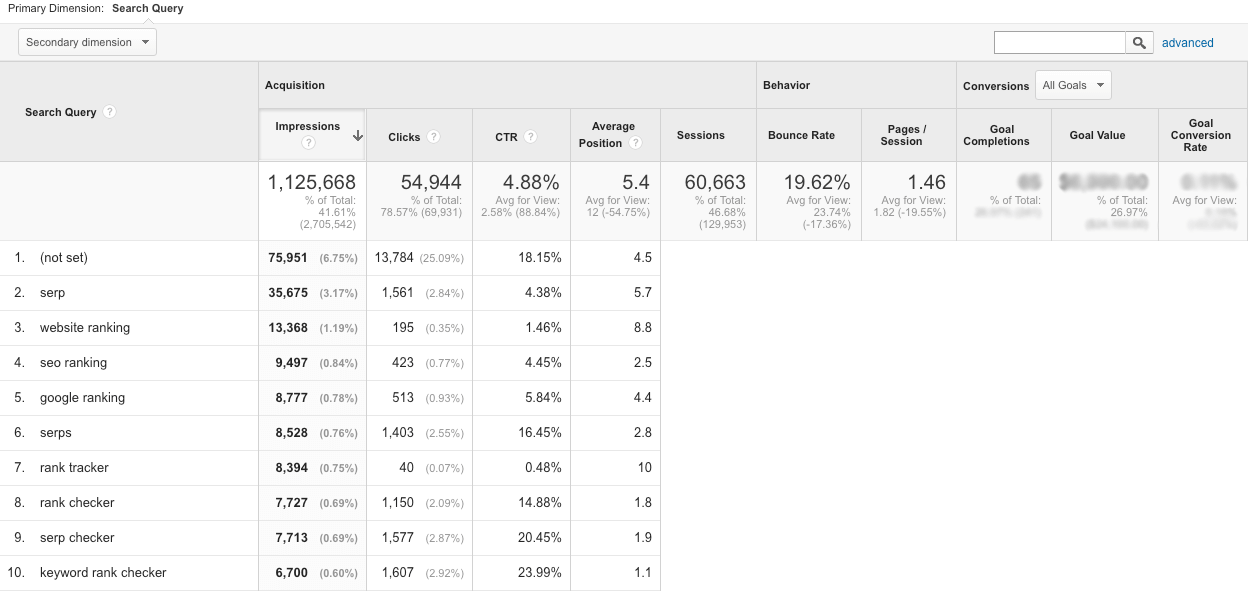
If you see (not set) or (other) in your top results, it simply means traffic was coming to your site didn’t have a keyword. It could be from a different search engine that doesn’t include keyword info with Google Analytics, or for some other reason.
Knowing your current top-ranked keywords will show you how your SEO efforts are improving over time. You should see your top keywords appear there after optimization. If not, it’s an indicator your optimization isn’t working as well as it could.
Click-through Rate
Click-through rate (CTR) is a metric that measures how many people clicked a specific keyword to visit your site or landing page. It’s an important indicator that your keywords are click-worthy.
Even if you get your top keywords to #1 in Google’s SERPs, if you have low CTRs you’re not truly optimized.
To check your CTRs, go to Acquisition > Search Console > Queries (Search Console in Google Analytics) and you will see CTRs for specific keywords as well as an average CTR for all of your top ranked keywords.

Over time, you can see how SEO improvements impact your CTR.
Goal Conversion Rate
If you just want to track keyword ranking and organic site traffic, you don’t have to measure your sales and conversion rate. However, knowing your conversion rate can help you turn traffic into real sales.
After all, a keyword will lead a horse to water but it won’t make it drink.
Before you can benchmark your conversion rate, you need to set up goals. Goals allow you to track specific user interactions, like form submissions, button clicks, downloads, and so on.
If you want people to sign up for a membership tier or start a free trial, you would set up goals for each.
Here’s a quick video on setting up goals in Google Analytics (or a written guide, if you prefer).
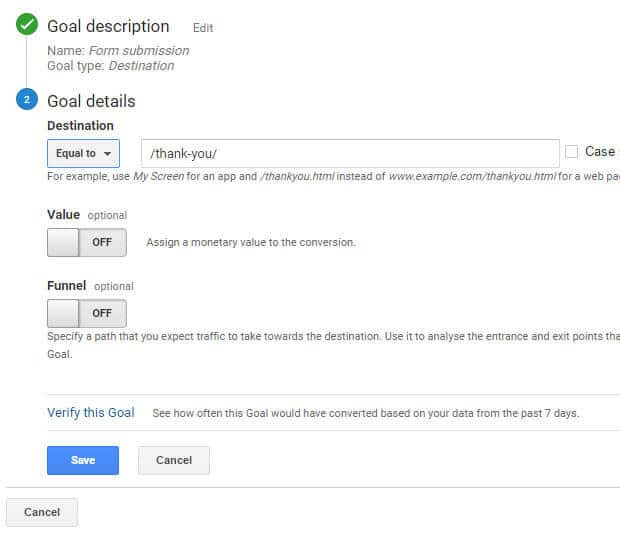
To see your conversion rates for each goal, go to Goals Overview > All Goals > Goal (click a specific goal). It should appear next to your other goal metrics.
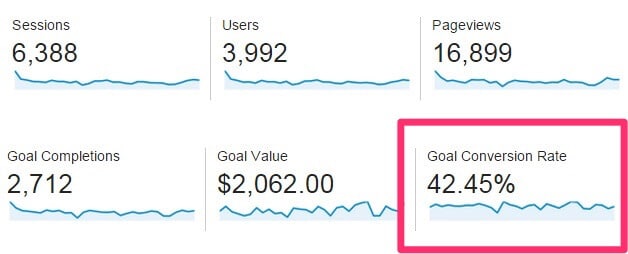
Benchmark your current goal conversion rate. If you didn’t previously have goals set up before now, you will most likely have to track your site metrics for a few months before you start seeing changes to this percentage.
Additionally, you can track bounce rate and time spent on page for each of your goals/landing pages and keywords. Here’s a guide to benchmarking metrics in Google Analytics.
Once you have your top metrics ready to track, it’s time to start optimizing your WordPress site.
Step 2: Optimize Your WordPress Site Setup
In terms of optimization, the good news is that WordPress makes it easy. With the use of plugins and some core features of the platform, you can quickly optimize your site for Google’s crawling.
Here are a few SEO best practices you’ll want to follow:
- Upgrade to HTTPS.
- Update your core, plugins, and themes.
- Optimize your images.
- Add a site map.
- Make your site mobile-friendly.
- Minify your code.
- Cache your site.
- Add a content delivery network (CDN)
Let’s dive in…
Upgrade to HTTPS
First things first: Make sure your WordPress site is upgraded to HTTPS.
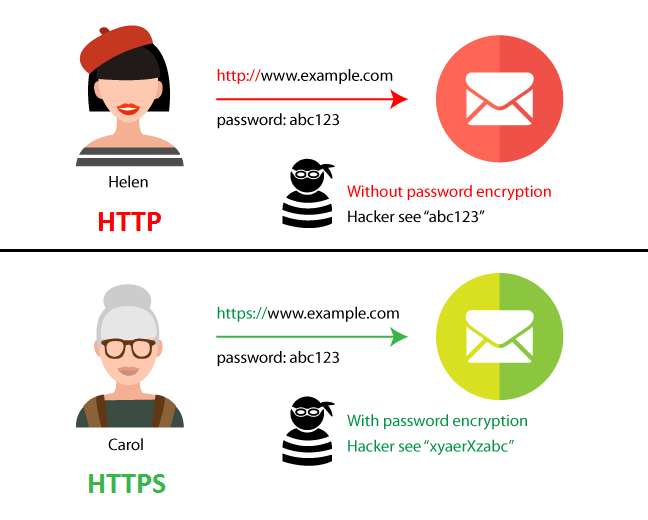
Google first announced HTTPS as a minor ranking factor in 2014, but since then their algorithm has highly favored secured sites — particularly secure, mobile-friendly sites — over unsecured ones (HTTP).
If you don’t accept payment on your membership site, HTTPS isn’t a make-it-or-break-it ranking factor. However, if you do accept credit cards and you want to remain PCI compliant (and make Google happy), you need HTTPS. It’s also a good idea to secure your site in general, especially as cybersecurity threats continue to wreak havoc around the web.
Here’s a guide from MemberMouse on setting up HTTPS with your WordPress site.
The basic steps are as follows:
- Purchase and install an SSL Certificate from your host.
- Verify your SSL Certificate is installed correctly.
- Check WordPress SSL settings.
- Secure pages on your website.
Additionally, you can set up Search Console to track your HTTPS site (NOTE: HTTPS sites are tracked differently from HTTP sites, so be sure to set this up when you transition) and you can modify your sitemap to reflect your secure status (we’ll get to that in Step 3).
Update Your Core, Plugins, and Themes
WordPress as a platform doesn’t directly impact your SEO but updating it is extremely important, as updates often include security features that prevent cybercriminals from installing malicious code on your site through plugins or hacks.
Malicious code and other hacks can negatively impact your SERP results.
To update WordPress’ core, navigate to Home > Updates from your dashboard (WordPress will also let you know it’s time to update).

To update your plugins, navigate to Plugins > Installed Plugins. From there, you can select the individual plugin to update, or bulk-update using the tab at the top.
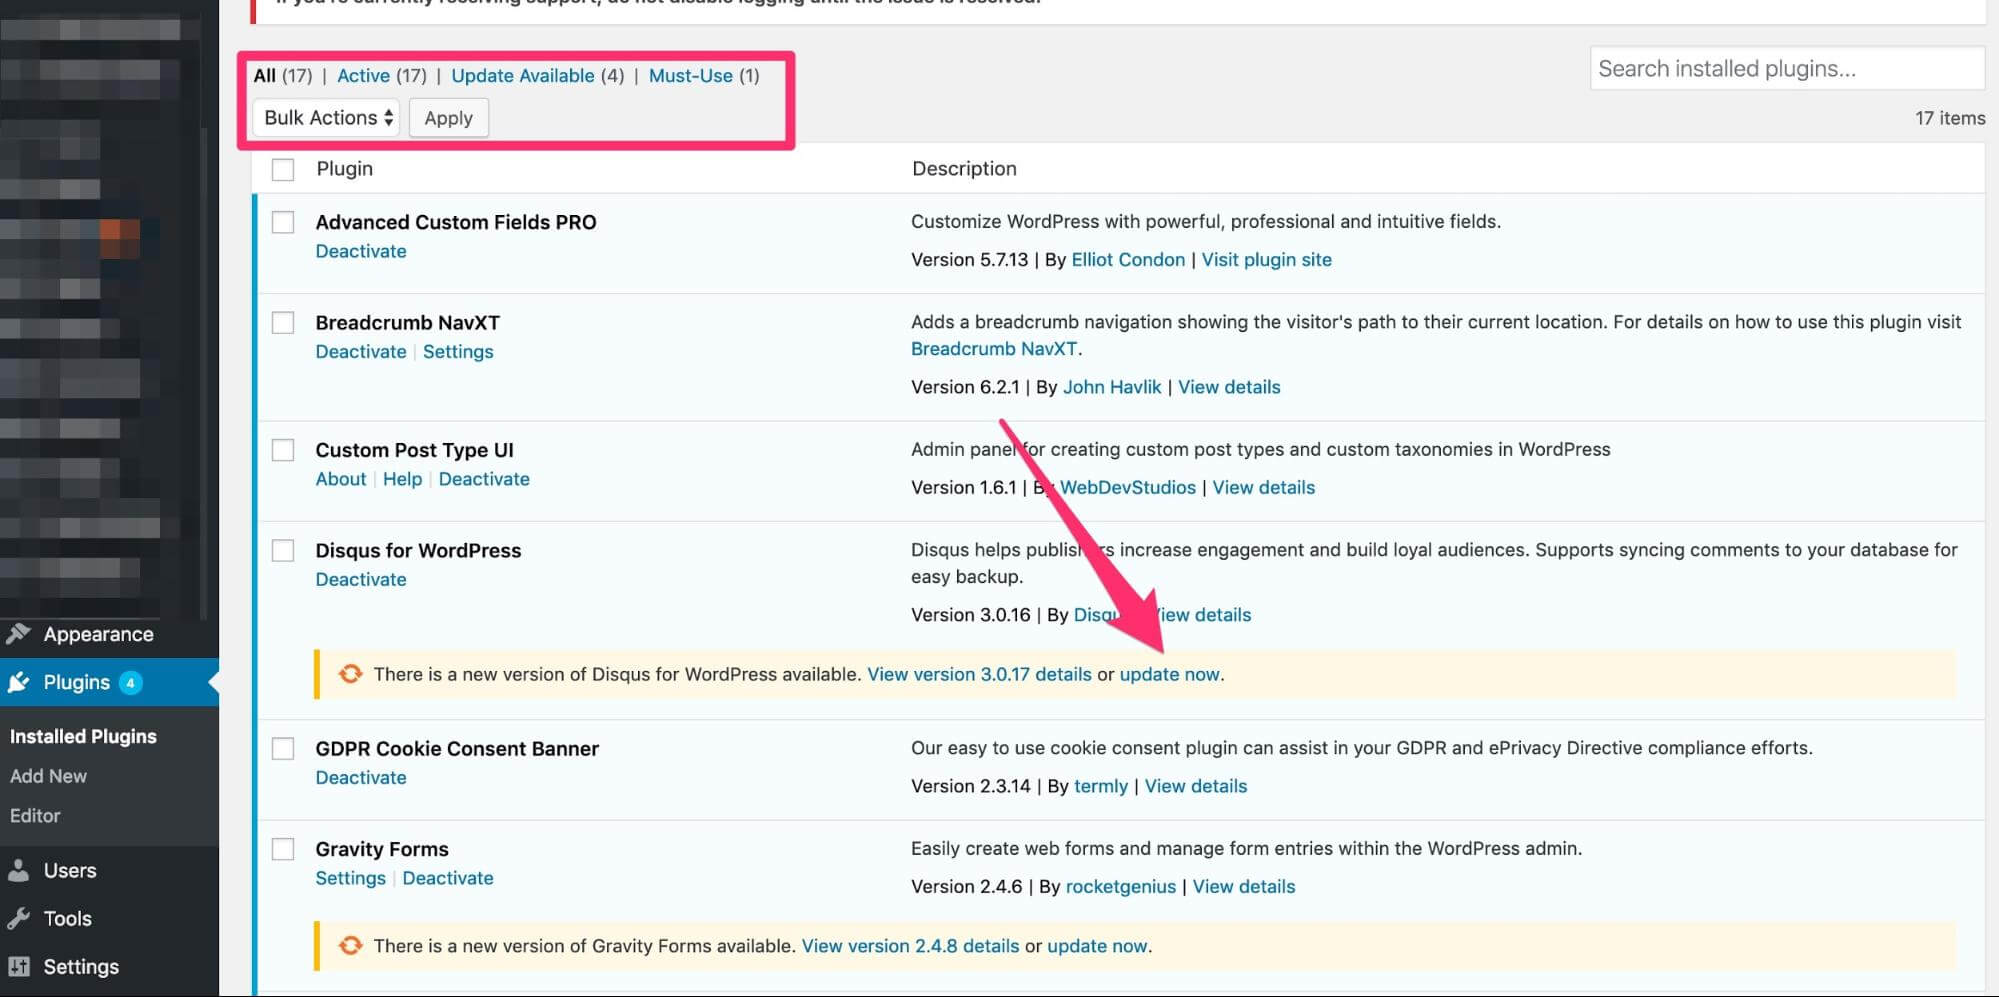
Another general best practice is to delete any plugins you don’t use. Here are more tips for decreasing WordPress bloat for your membership site.
You can update your theme by navigating to Appearance > Themes and updating your active theme as well as any other themes or child themes you have. Again, it’s a best practice to delete any unused themes. But if you need to keep them for a specific reason, then make sure they’re updated.
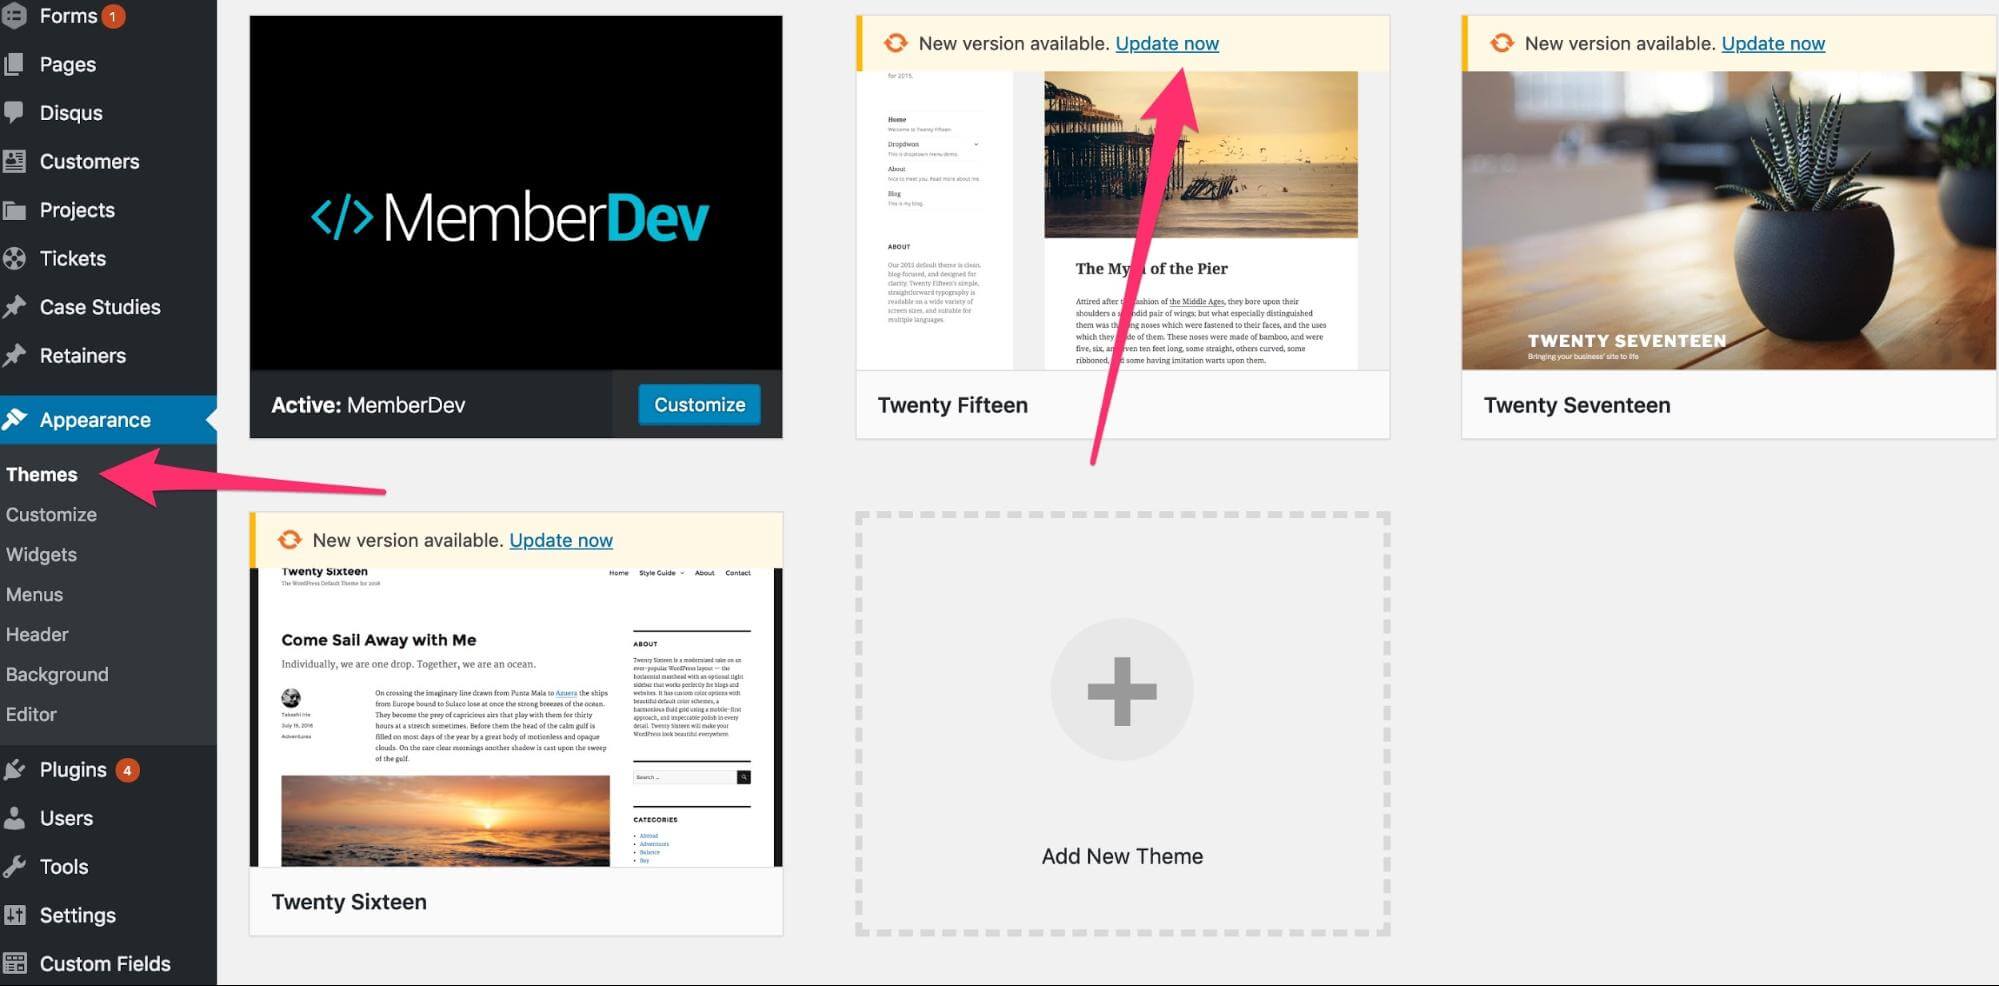
You should check for updates any time you’re on your site, or set a reminder for yourself to check for updates weekly.
Optimize Your Images
If you’ve done even the slightest of SEO research, you’ll know that image optimization is a big deal. Image optimization can impact loading speeds as well as Google’s crawlers. Google looks for keywords in image descriptions as well as the body copy of your pages (we’ll get to that in Step 3).
There are plenty of articles out there on the topic so we won’t do a deep dive, but there are a couple of ways you can optimize your images in WordPress.
You can optimize your images BEFORE you load them into WordPress with a tool like TinyPNG.com.

TinyPNG (or similar) will reduce your image sizes with “lossy” compression — compressed without the loss of quality — and will strip away unnecessary metadata that can impact image loading speeds. You can compress up to 20 images at a time for free.
You can also optimize your images AFTER you load them into WordPress by using a plugin. This isn’t the recommended way to do it if you’re adding in new images, as every additional plugin you use creates unnecessary bulk (which Google hates). But if you already have a bevy of images you need to optimize, this is an easy way to do it.
A plugin like Compress JPEG and PNG Images (by TinyPNG), EWWW Image Optimizer Cloud, and Imagify can bulk-edit your images to make them SEO-friendly.

A note about image optimization: Google measures image optimization based on percentages rather than raw size. So a 4 KB image compressed to 2 KB (50%) is the same in Google’s eyes as a 4,000 KB image compressed to 2,000 KB. So it matters less if you have huge image files as long as they’re compressed.
Add a Site Map
A site map lets Google’s crawlers follow the links to all your individual landing pages so that it won’t miss out on anything. It can also be used for searchers who are trying to locate specific information from your site.
A Sitemap is pretty easy to create in WordPress using a plugin like Google XML Sitemaps plugin. This will help you generate an XML sitemap without having to do anything but activating it. It will automatically submit your site map to Google and indicate when new content is added to your site (so Google can re-crawl).
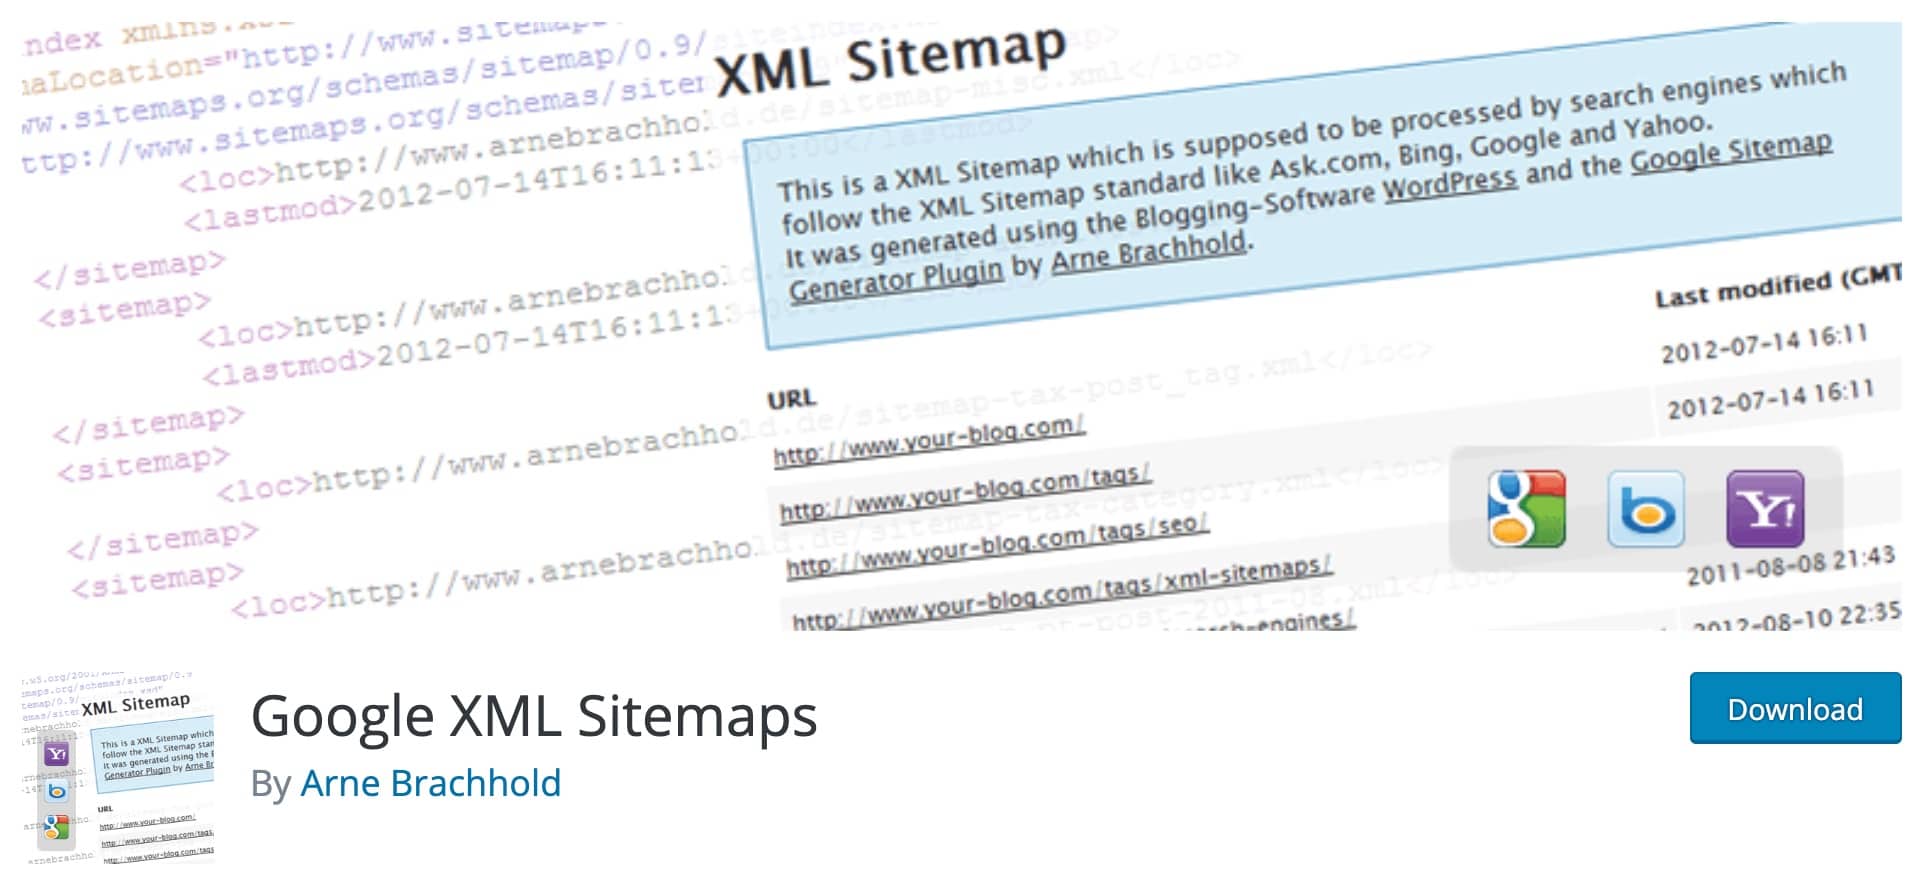
If you need to link to your site map, you can quickly find it at the following address (after it’s been populated by your plugin): http://YourURL/sitemap.xml
Site maps should also be included in the footer of your landing page.
Make Your Site Mobile-Friendly
To ensure your site is prepared for Google’s mobile-first indexing, start with your theme. If you’ve recently installed a new WordPress theme, there’s a good chance it’s already mobile-optimized.
Double check the description of the theme for indicators.
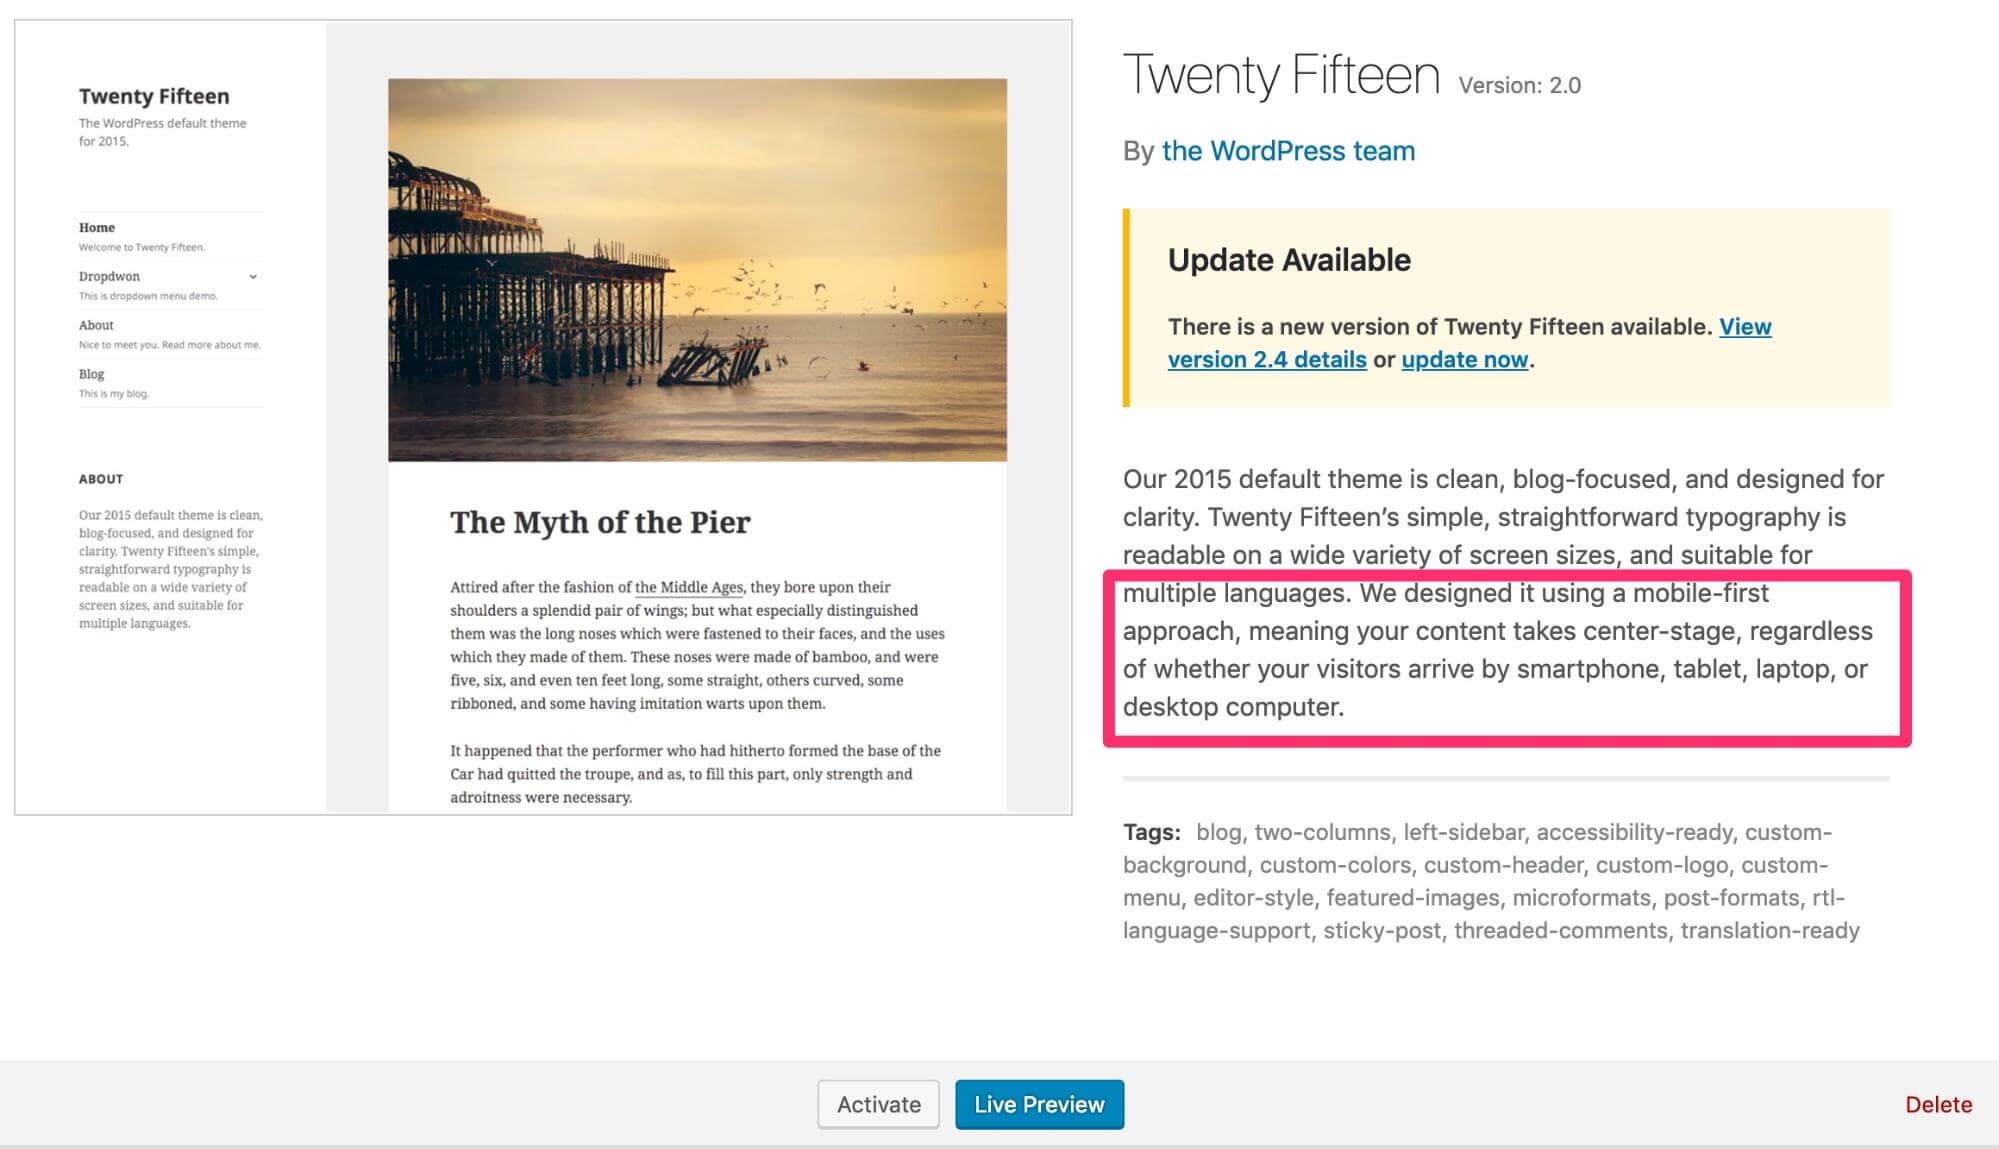
If you’re not sure your theme is fully mobile-optimized (or even if it is), consider switching to a custom theme that’s built for mobile users. Pre-made themes aren’t always customized for speed and performance (Google ranking factors).
The next step is to prepare your URLs for mobile-first indexing. This applies to sites that have separate desktop and mobile content. If your site has the same content for both, then you can skip this step.
Here’s what Google has to say about mobile-first indexing:
If your site has separate desktop and mobile content, which means you have a dynamic serving or separate URLs (or m-dot) site, make sure you follow the best practices:
- Your mobile site should contain the same content as your desktop site. If your mobile site has less content than your desktop site, you should consider updating your mobile site so that its primary content is equivalent with your desktop site. This includes text, images (with alt-attributes), and videos – in the usual crawlable and indexable formats.
- Structured data should be present on both versions of your site. Make sure URLs in the structured data on the mobile versions are updated to the mobile URLs. If you use Data Highlighter to provide structured data, regularly check the Data Highlighter dashboard for extraction errors.
- Metadata should be present on both versions of the site. Make sure that titles and meta descriptions are equivalent across both versions of your site.
You can also set up Accelerated Mobile Pages (AMP) for your blog posts, which we cover in our free download The SEO Guide for WordPress Blog Posts (at the start or end of this post). You can also find a guide for AMP pages here.
The following best practices will also help make your site mobile-friendly.
Minify Your Code
This next step is an important one, but it’s also a complicated one. You will need to be somewhat familiar with JavaScript and CSS, or know/be able to hire a good WordPress developer (read this before hiring a dev).
Most WordPress sites load several JavaScript and CSS files every time a page loads. The more plugins and added functionality you have, the more files there are to load. This impacts loading speeds, mobile-optimization, and more.
The solution is to minify your code (eliminate render-blocking JavaScript and CSS) using a mixture of techniques.
Here is an in-depth walkthrough for minimizing your code.

Some plugins like W3 Total Cache and Better WordPress Minify can also help with this process, but again, this is ideally done by an experienced WordPress developer. If you’re really unsure about what you’re doing and you’re set on DIY optimization, you can rely on one of the plugins above.
Cache Your Site
Caching allows your site to store important assets on servers and browsers in order to load quickly. As we mentioned before, browsers will often cache sites automatically, but it’s important not to rely on your visitor’s browsers to do all the work.
You can cache your site by installing caching or performance plugins, but depending on your server setup and/or your WordPress host, you may have caching optimized already.
If you have Kinsta, for example, you can use the Kinsta MU (Kinsta WordPress Cache), which is installed by default on all Kinsta sites.
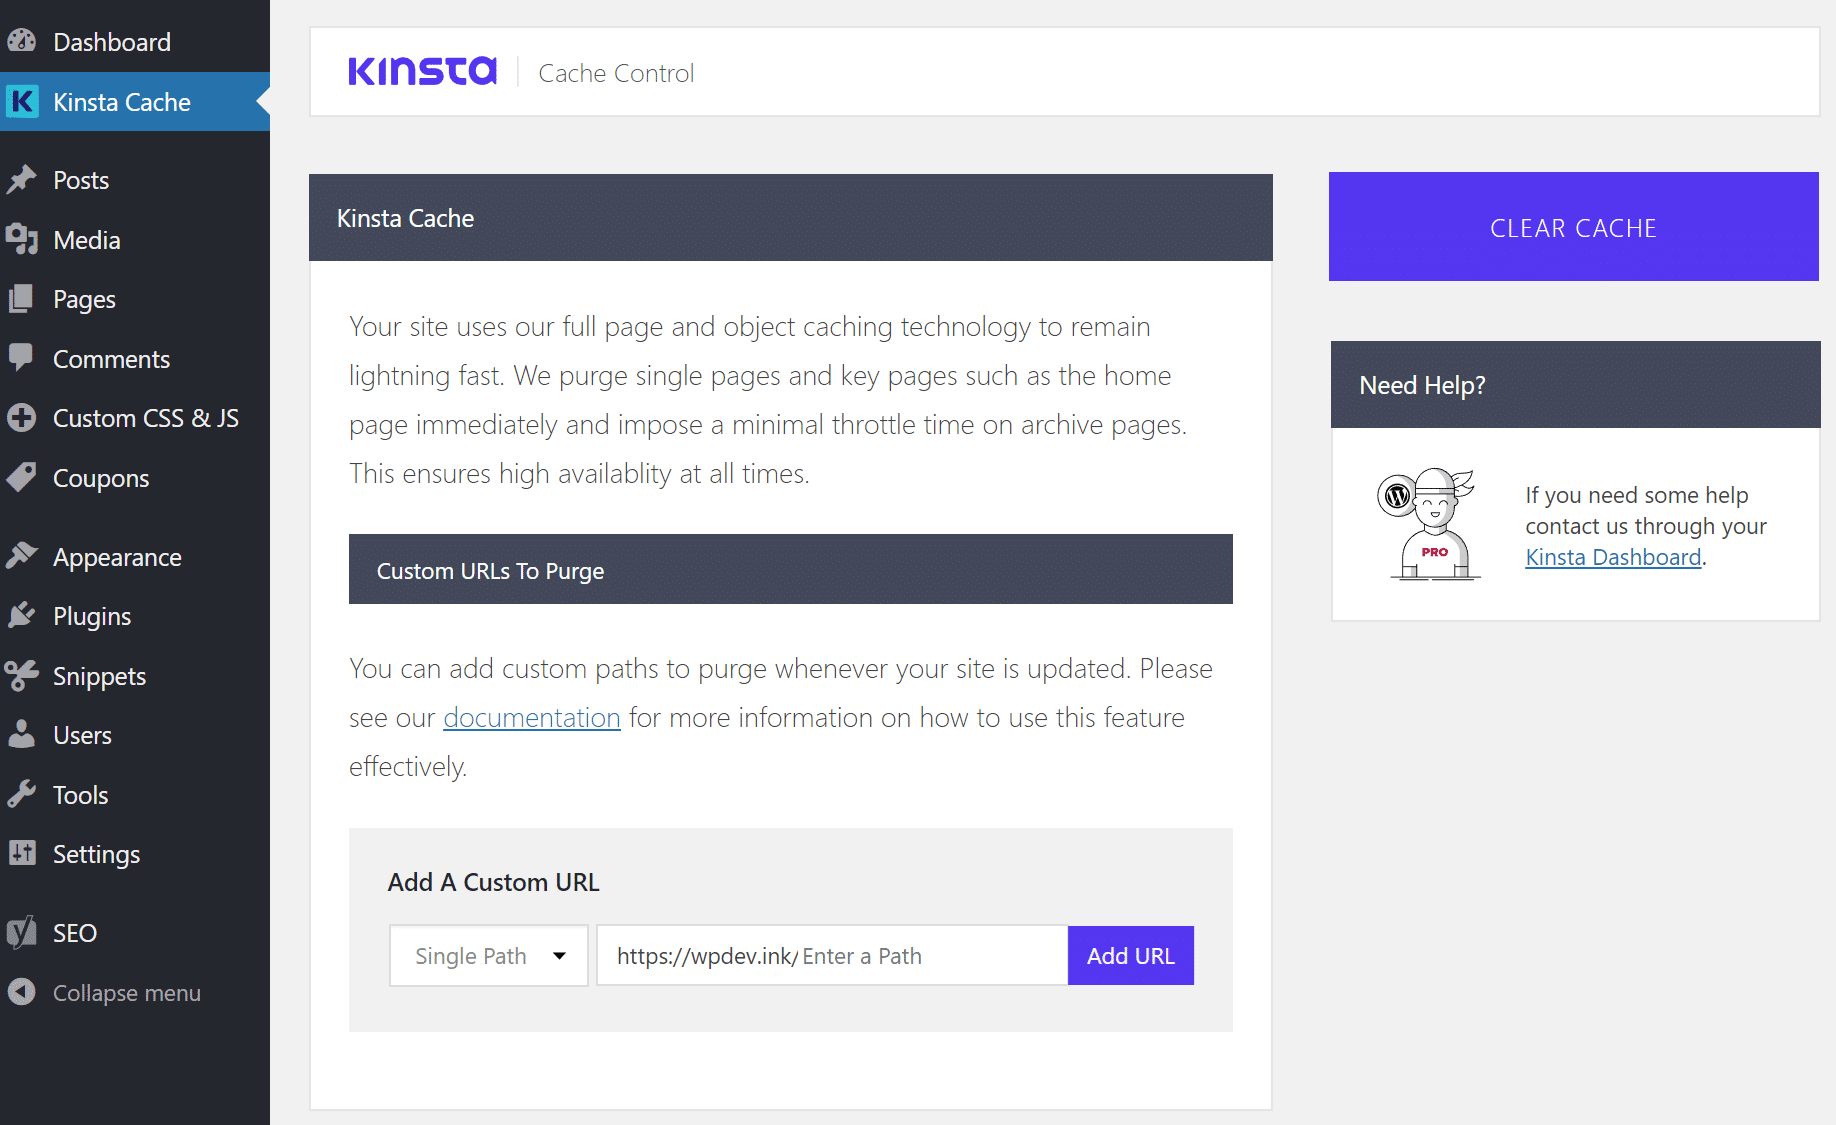
Double check to see if your WordPress host uses a caching plugin or tool already. If not, you can use a plugin like W3 Total Cache, though again, adding plugins runs the risk of slowing down your site.
Add a Content Delivery Network (CDN)
In addition to caching your site, you can also use a Content Delivery Network (CDN).
A CDN is a collection of hosting servers based all over the world that store duplicates of your website’s files and data. As users come to your site, a CDN will find the physically closest server to them to download your site.
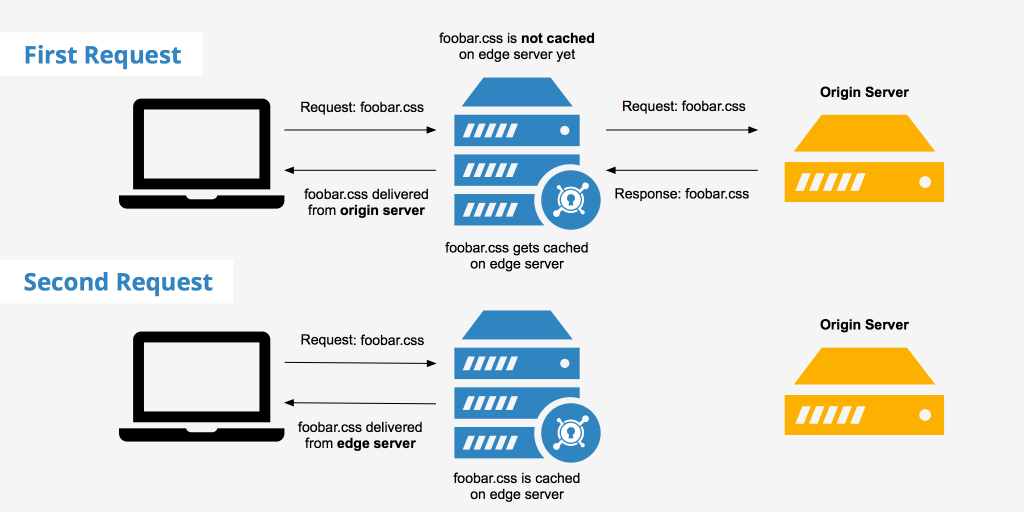
While this is entirely optional, it can be helpful for sites that have a global reach (large amounts of traffic coming from all over the world) or those with a lot of content (if bulky content is hurting your loading speeds, use a CDN).
Using a CDN can greatly improve loading speeds and performance.
In fact, a CDN typically can help offload 70% of bandwidth requests from your web host, and in some cases reduce load times by up to 50%.
The exception to the rule is if you’re running a strictly localized business and the majority of your traffic is local. In that case, a CDN can add an extra step that reduces performance and loading speeds.
Separate CDNs that work well with WordPress include:
If you use Kinsta you can take advantage of Kinsta’s CDN here. (Here’s why we recommend Kinsta as a WordPress host.)
Step 3: Optimize Your Site Content
By now, you’ve tracked your metrics and you’ve optimized your WordPress site for speed and performance. Now comes the fun part: content optimization.
This is where you’ll be leveraging user data, keywords, and metadata to ensure that your top SEO keywords are ready for Google’s crawlers.
In this phase, you will:
- Reorganize your site content.
- Optimize your opt-in forms.
- Structure your metadata.
- Perform keyword optimization.
Here’s what to know…
Reorganize Your Site Content
Now that you have WordPress optimized from a backend/coding perspective, it’s time to optimize from a frontend/user experience (UX) perspective.
First, take a look at your current metrics, including speed tests, mobile-friendly tests, and your Google Analytics conversions scores (etc.). Then, follow the recommended content best practices for adjusting your site’s organization.
For example, if your mobile speed test indicates that your site is not mobile-friendly, it will give you a few reasons for that score:
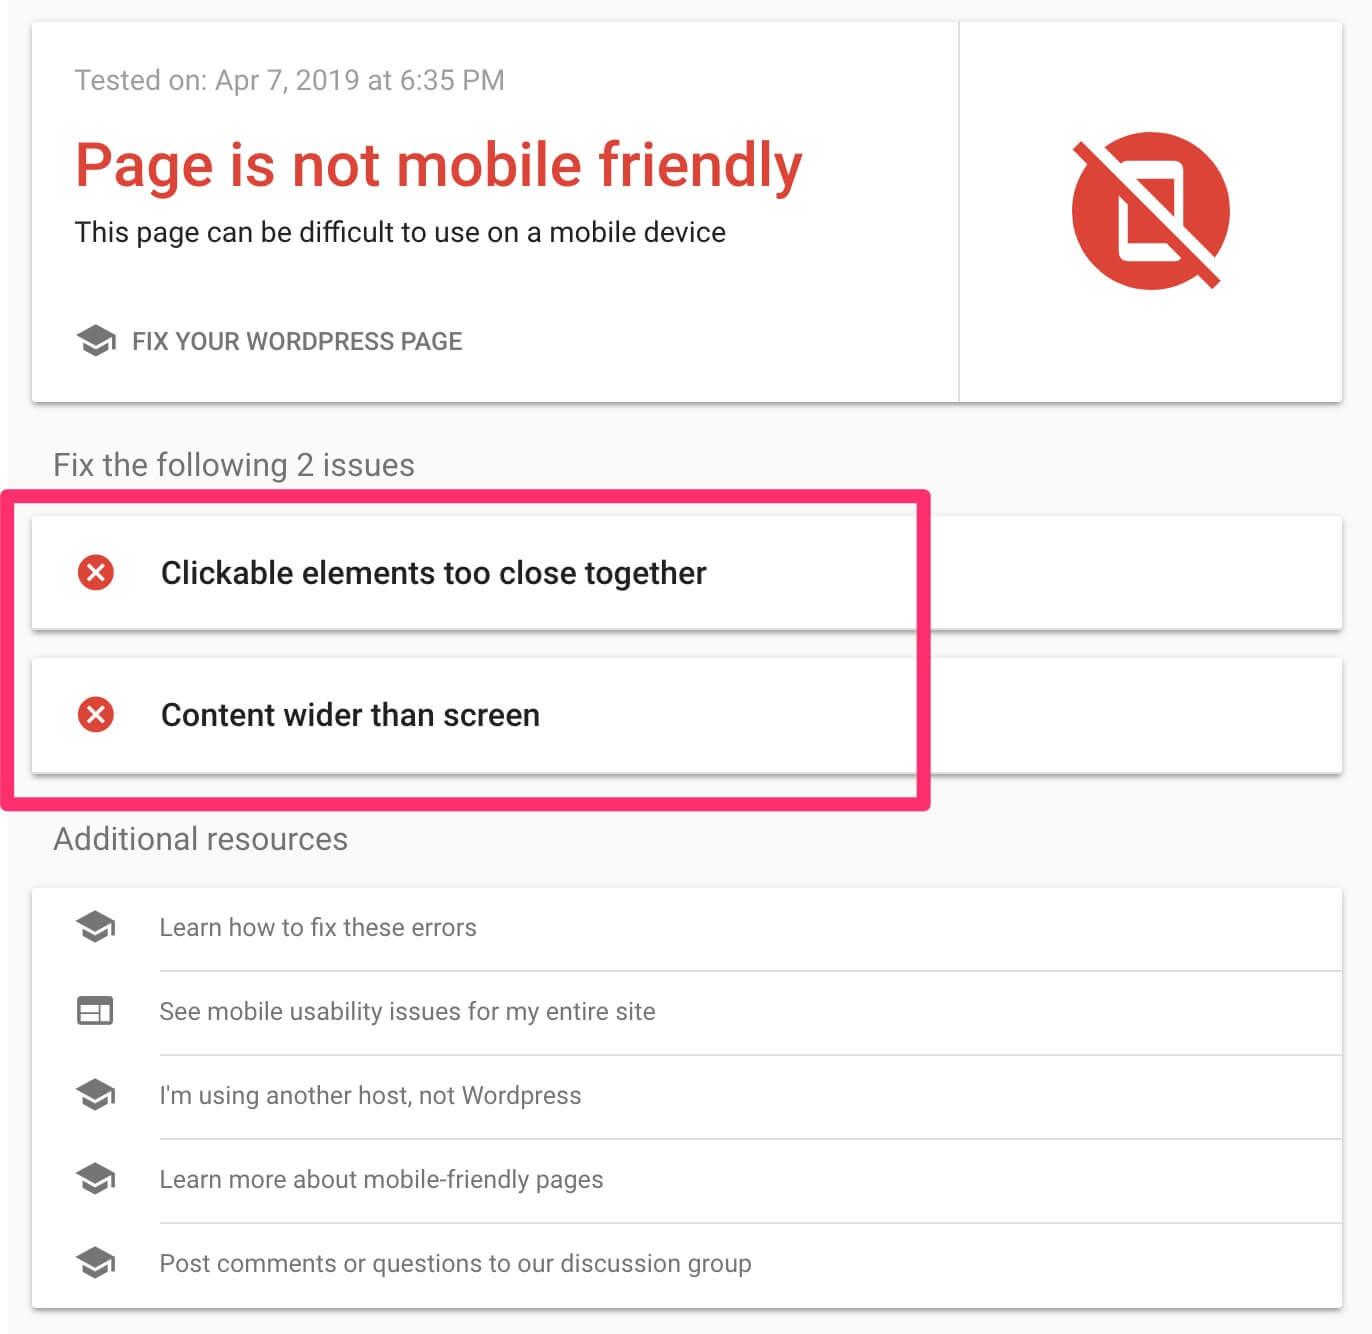
In the above example, you would organize your content to spread out your clickable elements like buttons, banners, images and text links.
For another example, say your homepage speed score is being penalized because of a massive JavaScript file being loaded by Google Maps.
To fix this, you could move the map to your contact page for an instant boost to your speed score.
Since this is a highly individualized step, it might take some time and research (and A/B testing) to get it right. Use the data presented by Google Analytics, PageSpeed Insights, and so on to help you improve your site content.
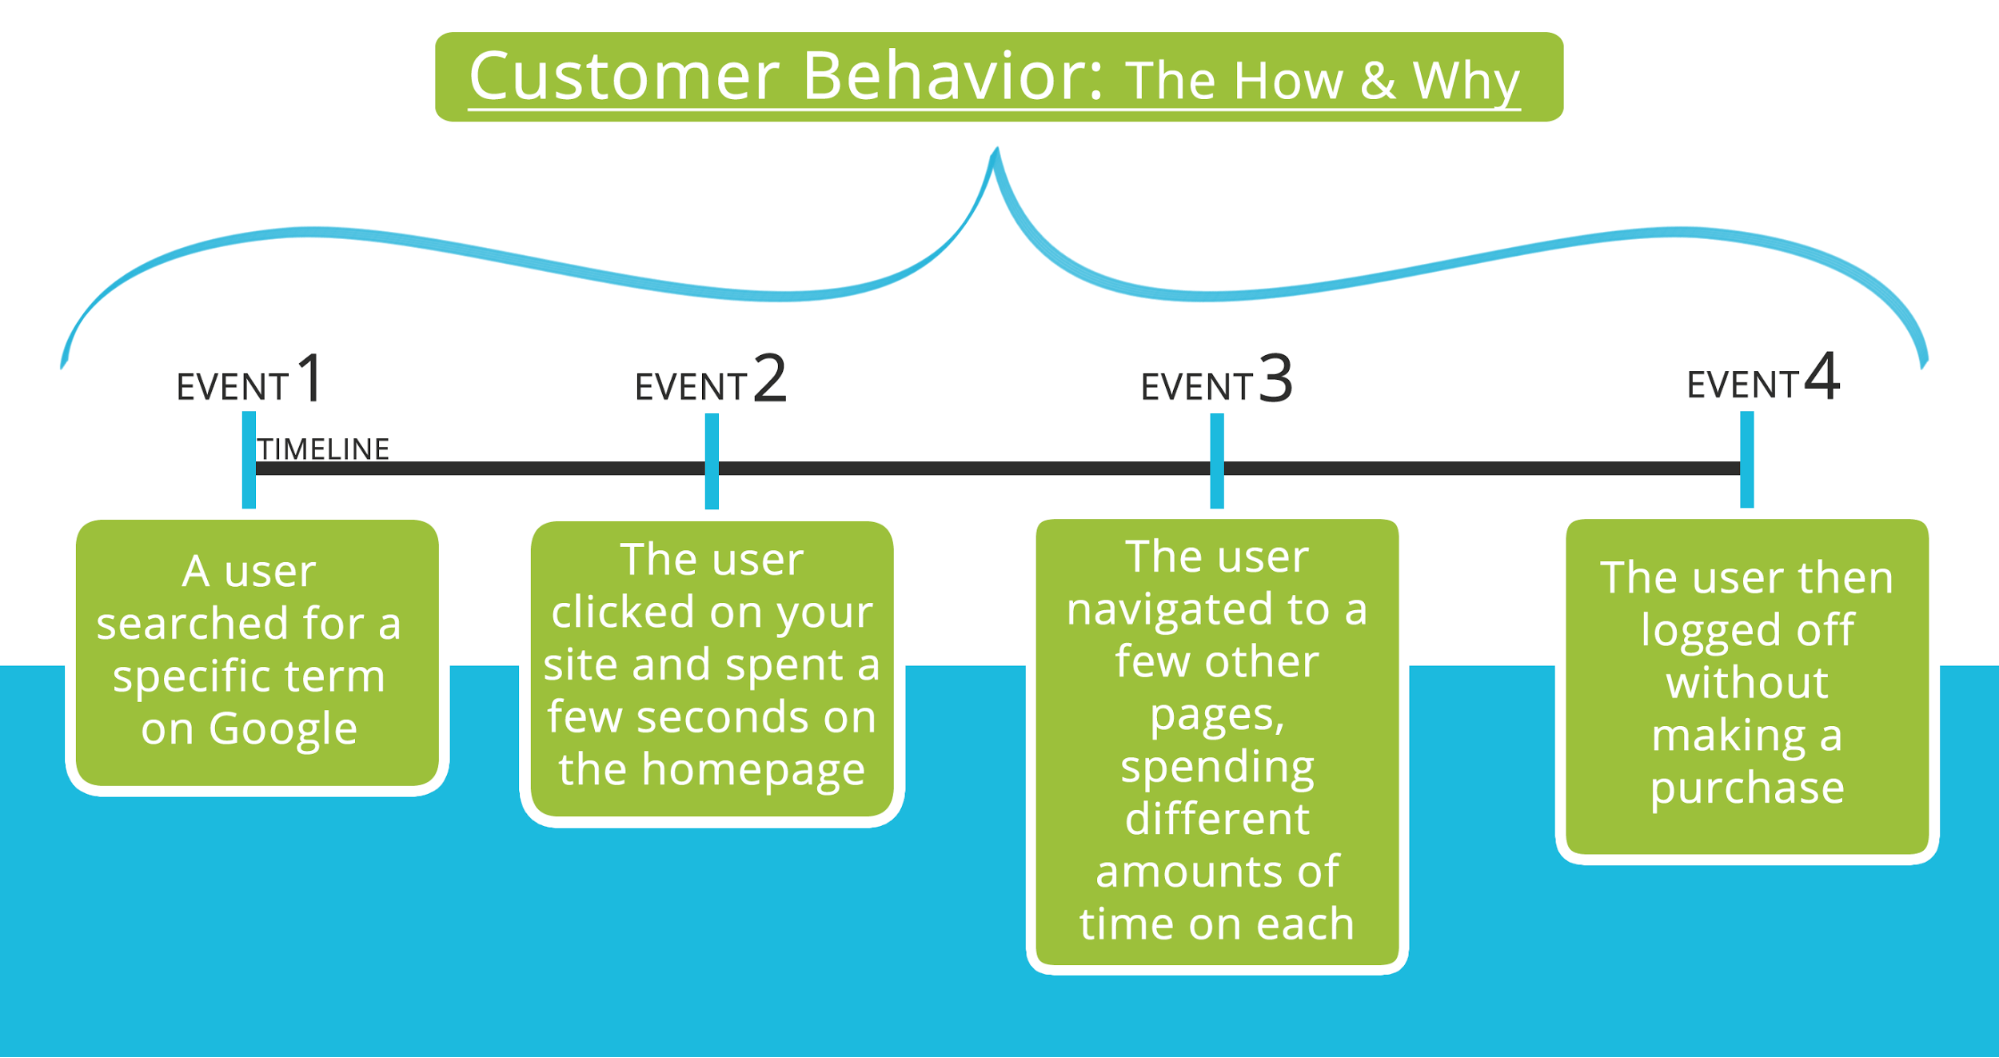
User data from Google Analytics, such as Page Views, time spent on page, and so on can all help you assess the UX of your site.
Optimize Your Opt-In Forms
An overlooked area that impacts both SEO and UX is your opt-in forms. You might not know this, but Google actually hates a lot of forms.
After Google’s mobile-first indexing update in 2018, Google applied some very specific rules for forms that are SEO-friendly. This set of rules impacts all forms, although pop-up forms especially invoke Google’s wrath.
Simply put, “intrusive” forms will receive a penalty under the new algorithm.
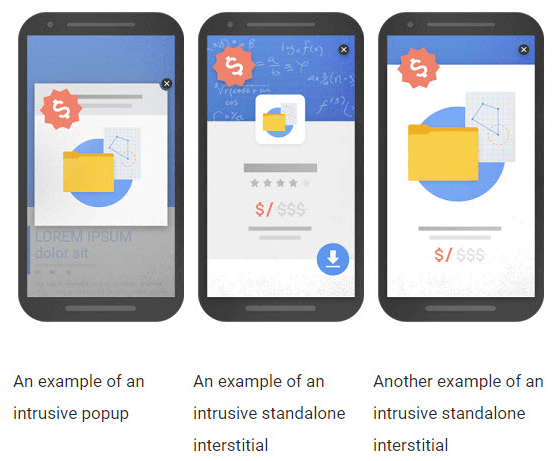
The solution is to use mobile-friendly (mobile responsive) forms. Gravity Forms is a great option for this, as their forms are all mobile-friendly and SEO-friendly.
If you’re not using Gravity Forms, you can also follow these best practices for optimizing your WordPress forms. This will ensure that Google doesn’t penalize you for something you didn’t know about.
Structure Your Metadata
Now we get into the foundational elements of SEO for WordPress. Your site metadata informs Google’s bots on what to index and why to index it. It’s the holy grail of SEO.
We’ll be covering metadata optimization for landing pages, which can include blog pages but is not necessarily blog-specific. For blog-specific optimization, check out our free download at the end of this post.
First, optimize your Title Tags.
A title tag is an HTML element that specifies the title of a web page.

If you want to check your landing page title tags, you can use Moz’s title tag preview tool.
Traditionally, you would place your top keywords in your title tags. While this is still a best practice, Google’s algorithm is actually able to interpret a page’s topic without needing an exact keyword in the title.
However, title tag keywords are still important for visibility, as your titles will appear in the SERPs, web browsers tabs, and on social network sites.
You don’t want to keyword stuff your title tags.
Again, Google can ascertain the topic just fine, so your keywords should be dual-purpose for Google’s algorithm and for user experience. Here are a few general guidelines for crafting a landing page title:
- Keep your titles under 60 characters and use character savers (“&” and “/”) to save space.
- Use one or two of your top keywords in the first half of your title.
- Include your site name or brand name in the last half (e.g. — MemberDev).
- Avoid using duplicate or too-similar titles (which can confuse Google).
If you’re not sure how to craft a landing page headline, here’s a guide from WordStream.
Optimize your heading tags (H1, H2, etc.).
After you’ve optimized your title tags, the next step is to optimize your heading tags. In terms of importance, your H1 tag is the most important, followed by each subsequent tag (H2, H3, etc.).
Your H1 tag acts as an information guide for Google’s bots.
Even if you don’t include exact high-ranking keywords in your title, Google can still find them in your tags. So it’s essential to include keywords in your H1 tag.
Contrary to popular opinion, your H1 tag doesn’t have to be at the very top of your page. It can be anywhere, it just has to include your keywords.
Here are some best practices for optimizing your H1 tags:
- Add only one H1 tag per page.
- Include one or two high-value keywords that relate to the page’s content (don’t keyword stuff).
- Ensure that your H1 tag is readable for humans (pay attention to font choice, font size, etc.).
- Make it as long as necessary (you can use up to 70 characters before Google stops caring).
- Make the H1 tag unique.
As an alternative approach to maximize the title tag and the H1 tag, you can use the highest volume (high-value) keywords in the title tag and the next most important keywords in the H1 tag.
For example, the search “SEO optimization” brings up a Moz article as the top result:

The title tag has an optimized keyphrase (beginner’s guide SEO) but not the one we searched for (SEO optimization). But Google understands that the content is the same. Clicking this link, we’re brought to a page that looks like this:
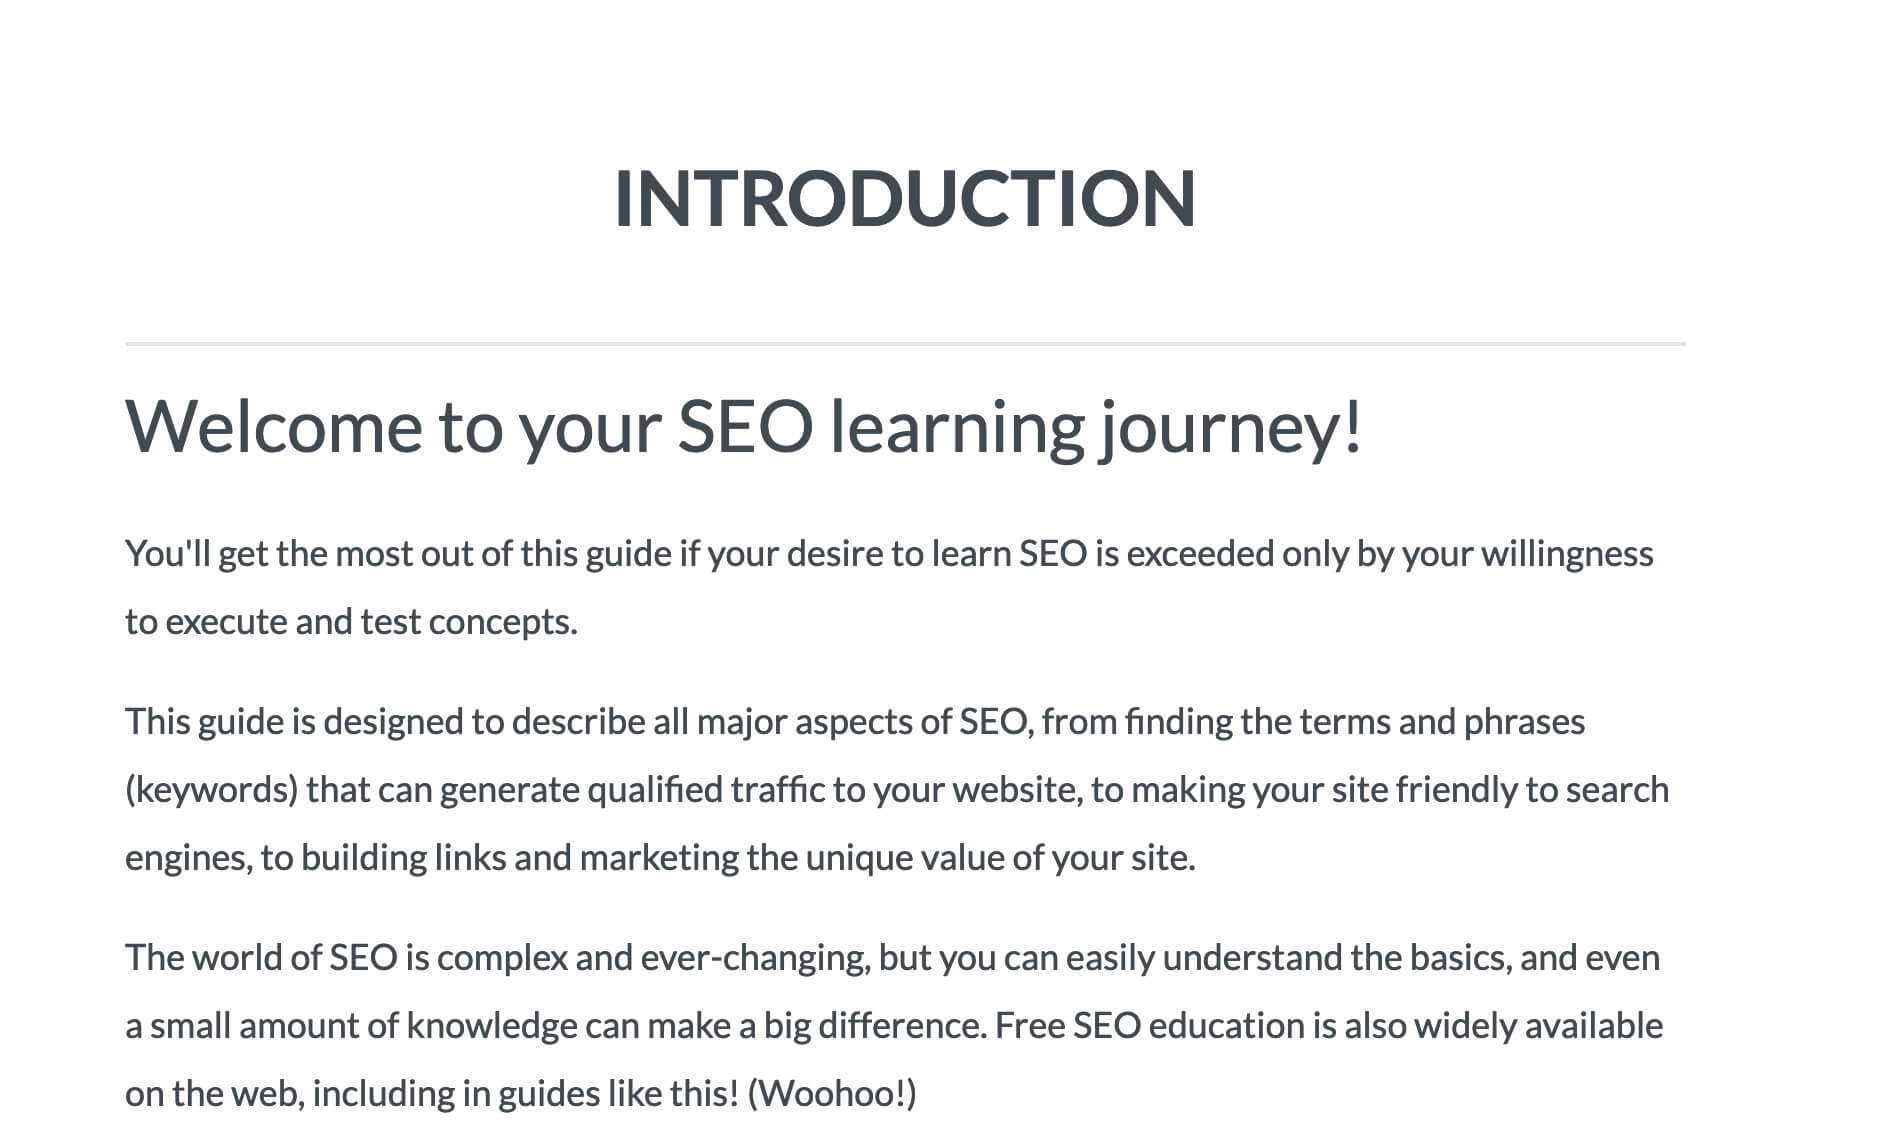
The H1 tag is actually the “Introduction” title. While this isn’t necessarily a keyword in and of itself when combined with the title “beginner’s guide to SEO” it encompasses a wide range of keywords, such as “Introduction to SEO.”
So while the title and H1 tag aren’t traditionally “perfectly optimized” for SEO, they work because of the way Google’s algorithm views content. So it’s okay for your title tag and H1 tag to play off each other.
Make the most of Hx tags (H2, H3, etc.).
As with the above example from Moz, you can see that the remainder of the tags on the page are optimized for keywords as well.
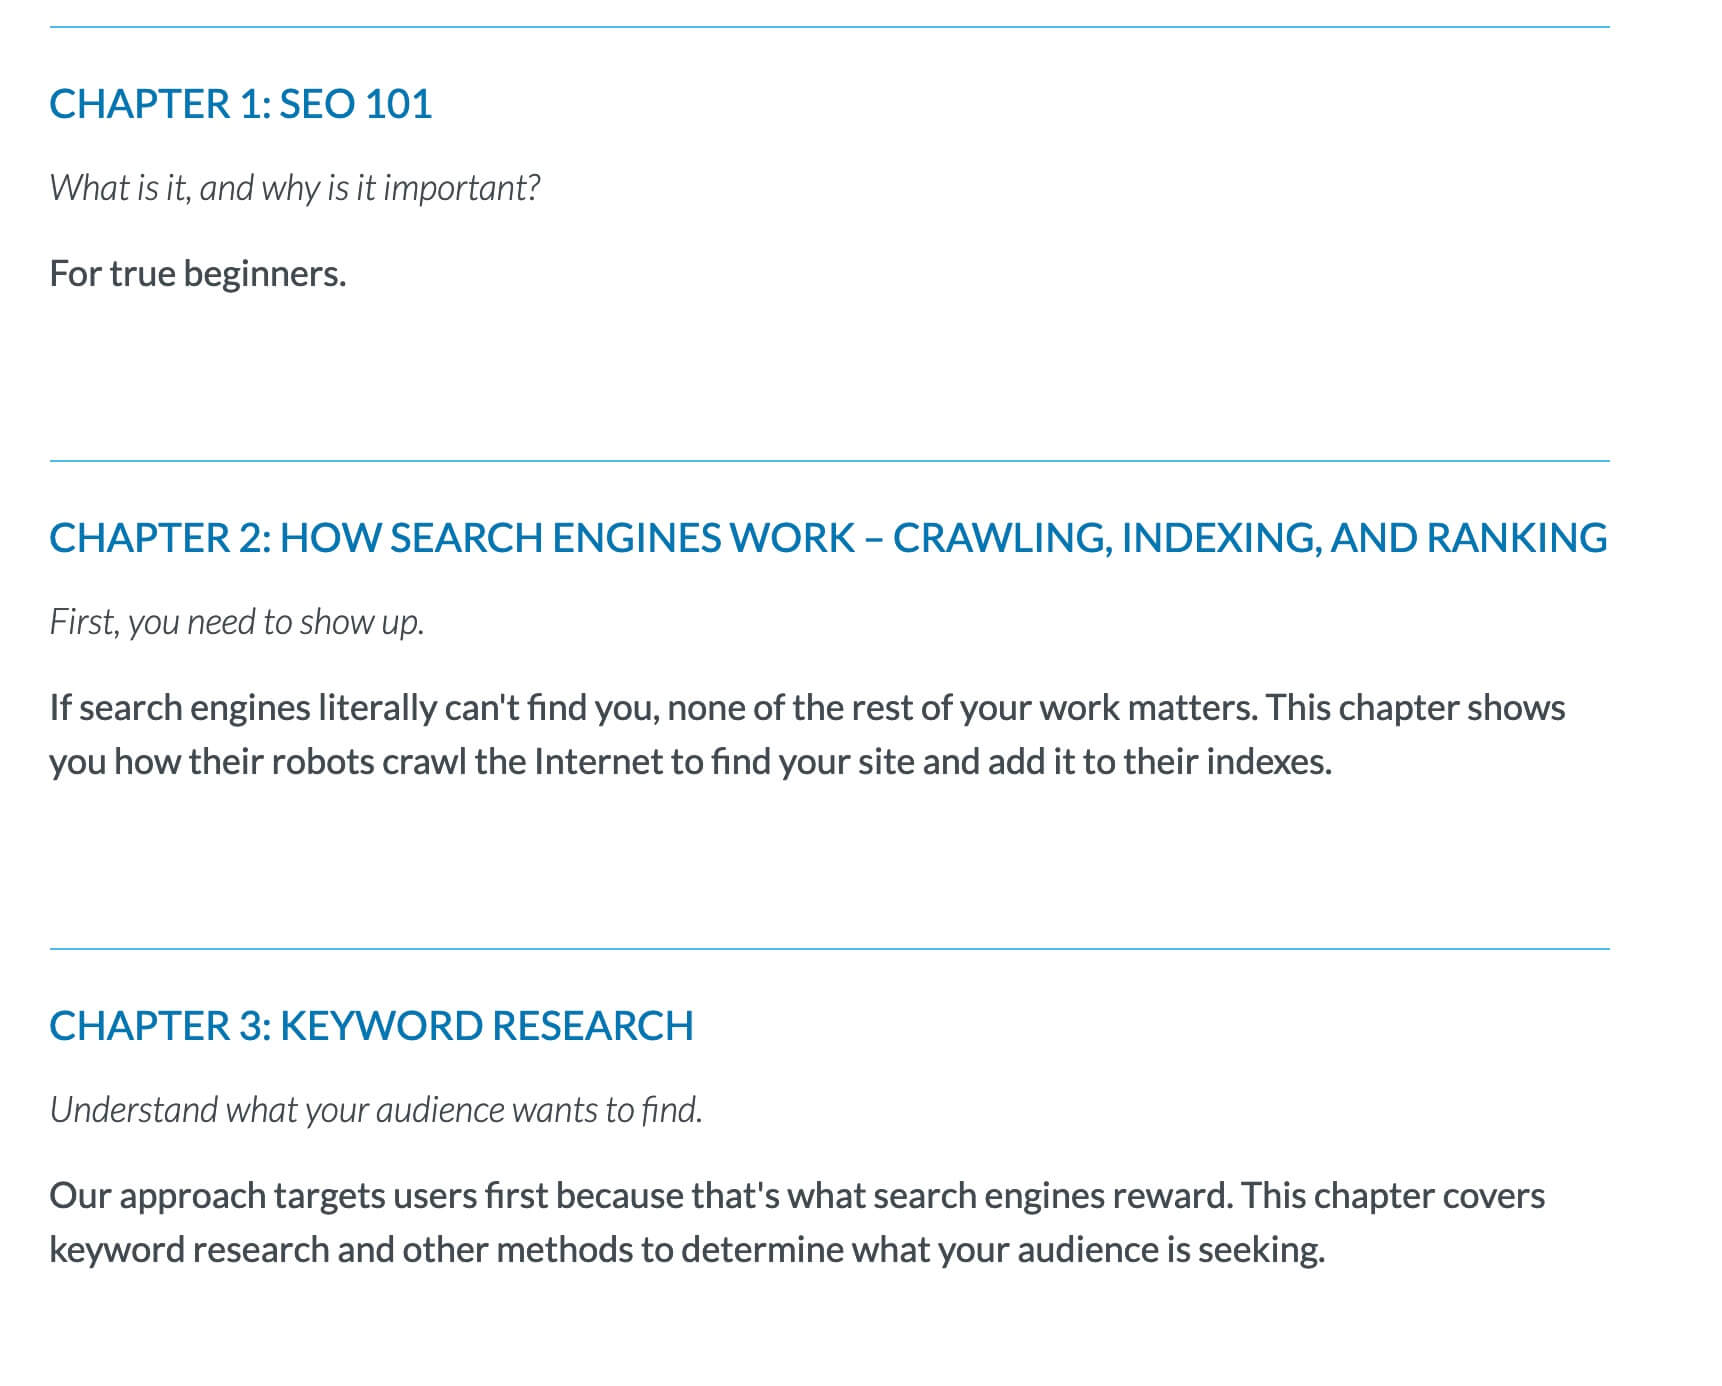
H2 and H3 tags can be placed anywhere else on the page. Hierarchy is still important for these tags, meaning you should place H3 tags after H2 tags, not before.
Here’s what Google’s John Mueller has to say about Hx tags:
[The order] doesn’t really matter. We use the headings to understand the context of the content on the page a little bit better and for that, we don’t need a strict order of the heading tags.
Tags H4, H5, H6 and beyond are used to break up text in a long post. They have the least impact on SEO of all the tags.
Just be careful not to use too many tags in a single page or post, as that can be seen as spammy — think of it as tag stuffing instead of keyword stuffing. Google doesn’t like it.
Here are some best practices for your Hx tags:
- Keep them brief (Hx tags are designed more for the reader than the crawler).
- Don’t use other tags within your tags (don’t insert an H5 in the middle of your H2).
- Don’t use links in Hx tags.
- Focus on using Hx tags to enhance reader understanding.
Keyword-optimize your meta description tag.
Your meta description tag is the description found underneath a page’s title in the SERPs and on social media. It’s used for one thing: to describe your page to searchers in the SERPs.

Google announced in 2009 that meta descriptions don’t directly factor into Google’s ranking algorithms, but they do impact your click-through rate. This means that they do somewhat matter to Google, but more importantly, they matter to searchers.
Here are some best practices to keep in mind when optimizing your meta description:
- Keep the length between 150-160 characters.
- Write a description that explains what the content is about for readers.
- Include both high-value and semantic keywords throughout your description.
- Avoid duplicate descriptions.
Check out Moz’s guide for optimizing your meta descriptions.
Optimize your meta descriptions for social media (using Open Graph).
Open Graph tags make snippets out of your links when they are shared via social media.
You can add a different description to your social media Open Graph than the meta description that Google uses. Here’s an example of a post shared on Twitter compared to its organic search result:
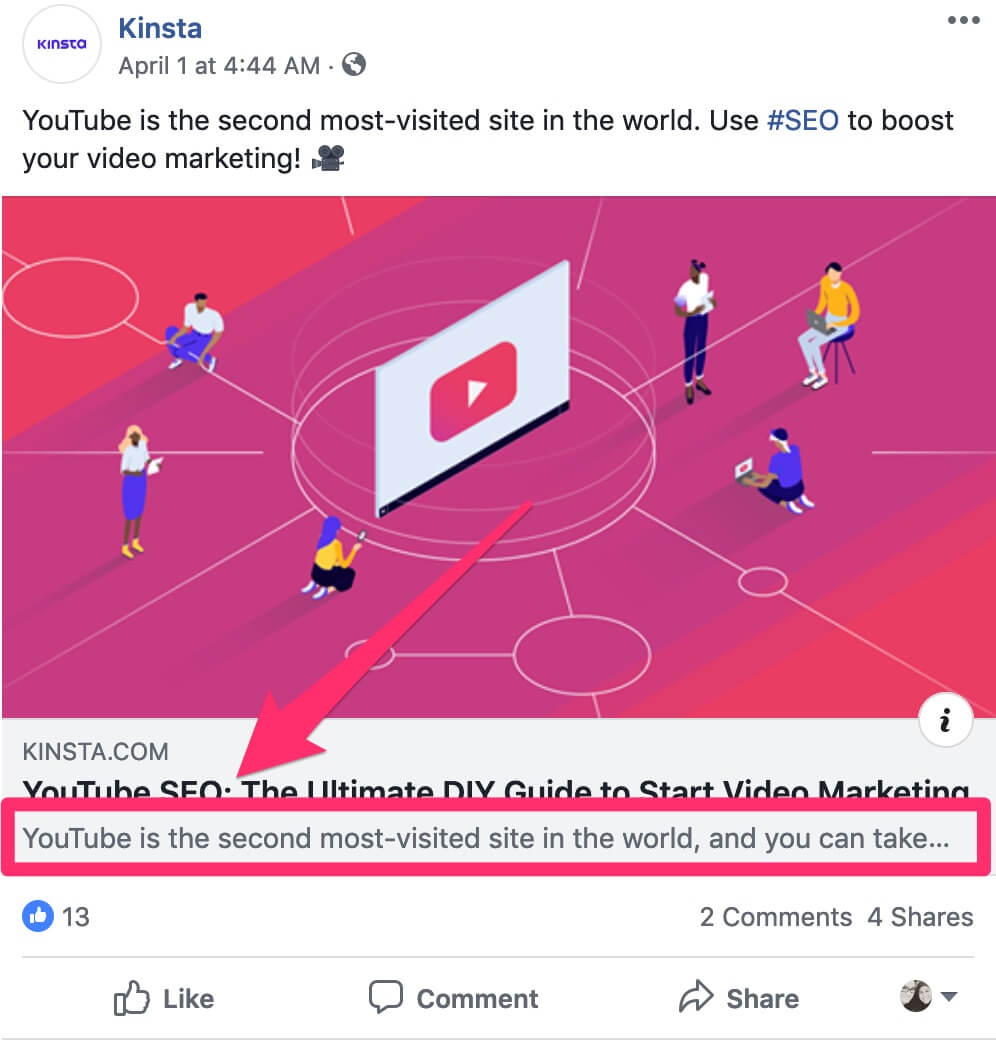
This helps you optimize your landing pages or blog posts for Google’s search results — including adding specific keywords that might make it a bit “clunky” — keeping it highly readable for social media.
Perform Keyword-Optimization
Once your title tags and Hx tags are optimized, the next step is to place keywords strategically throughout your landing page body copy.
Here’s the tricky part: if you include too many keywords in your body copy — also known as keyword stuffing — Google will penalize you.
Here’s how Google describes keyword stuffing:
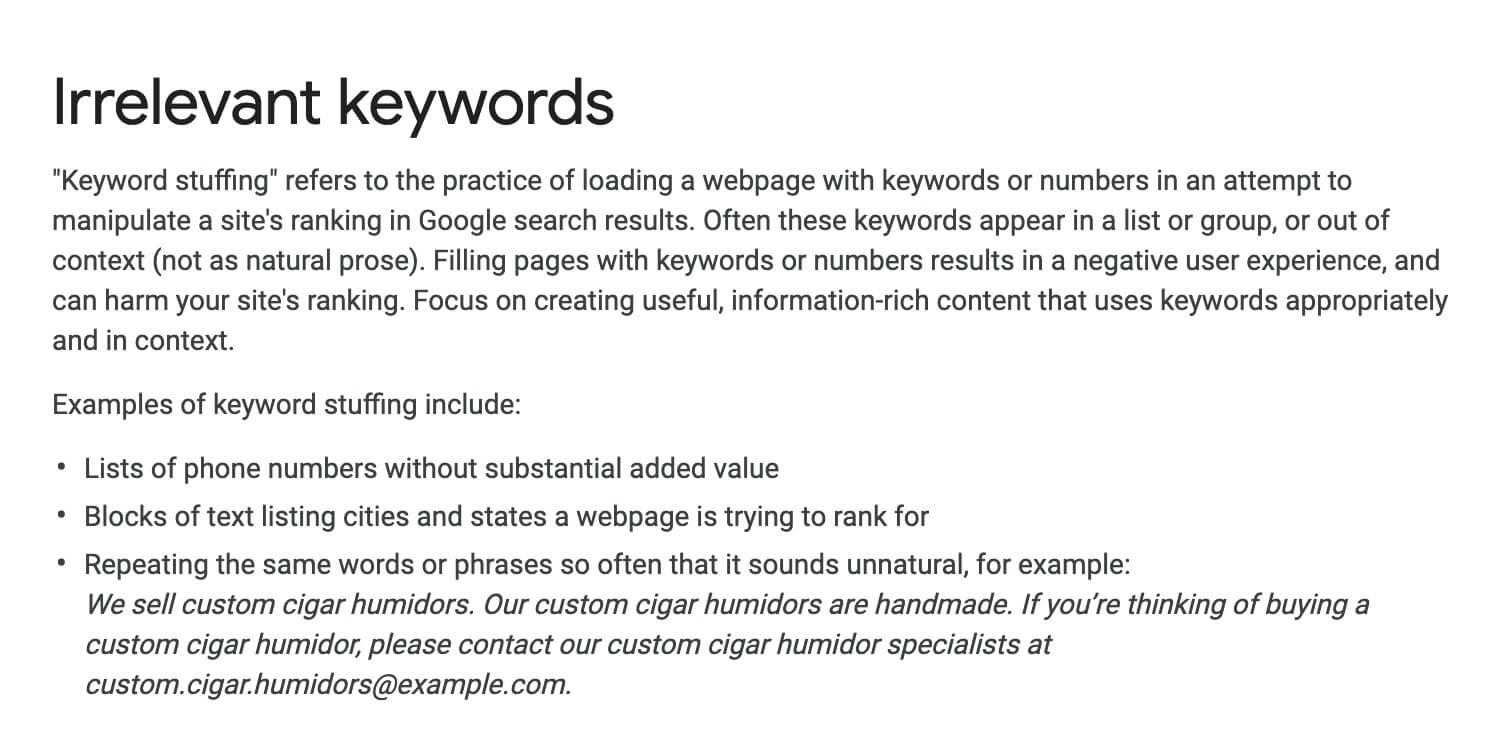
Basically, your text needs to sound believable and include only keywords that truly offer meaning. Remember, Google’s algorithm is optimized for searcher intent — if your content isn’t offering something of value to Google (yes, AI is getting good enough to know this), Google will penalize you.
Here’s how to optimize your body copy for keywords:
- Place high-value keywords in the first 100-150 words of the page.
- Use semantic keywords and related words/phrases throughout the remaining copy.
- Consider content length — shorter posts should have fewer keywords than longer posts.
Add Schema Markup for a featured snippet.
If you really want your content to stand out to Google, you can use Schema markup to let Google know you want a featured snippet.
A featured snippet is an area that will appear at the top of the SERPs with relevant information and a link to your page:
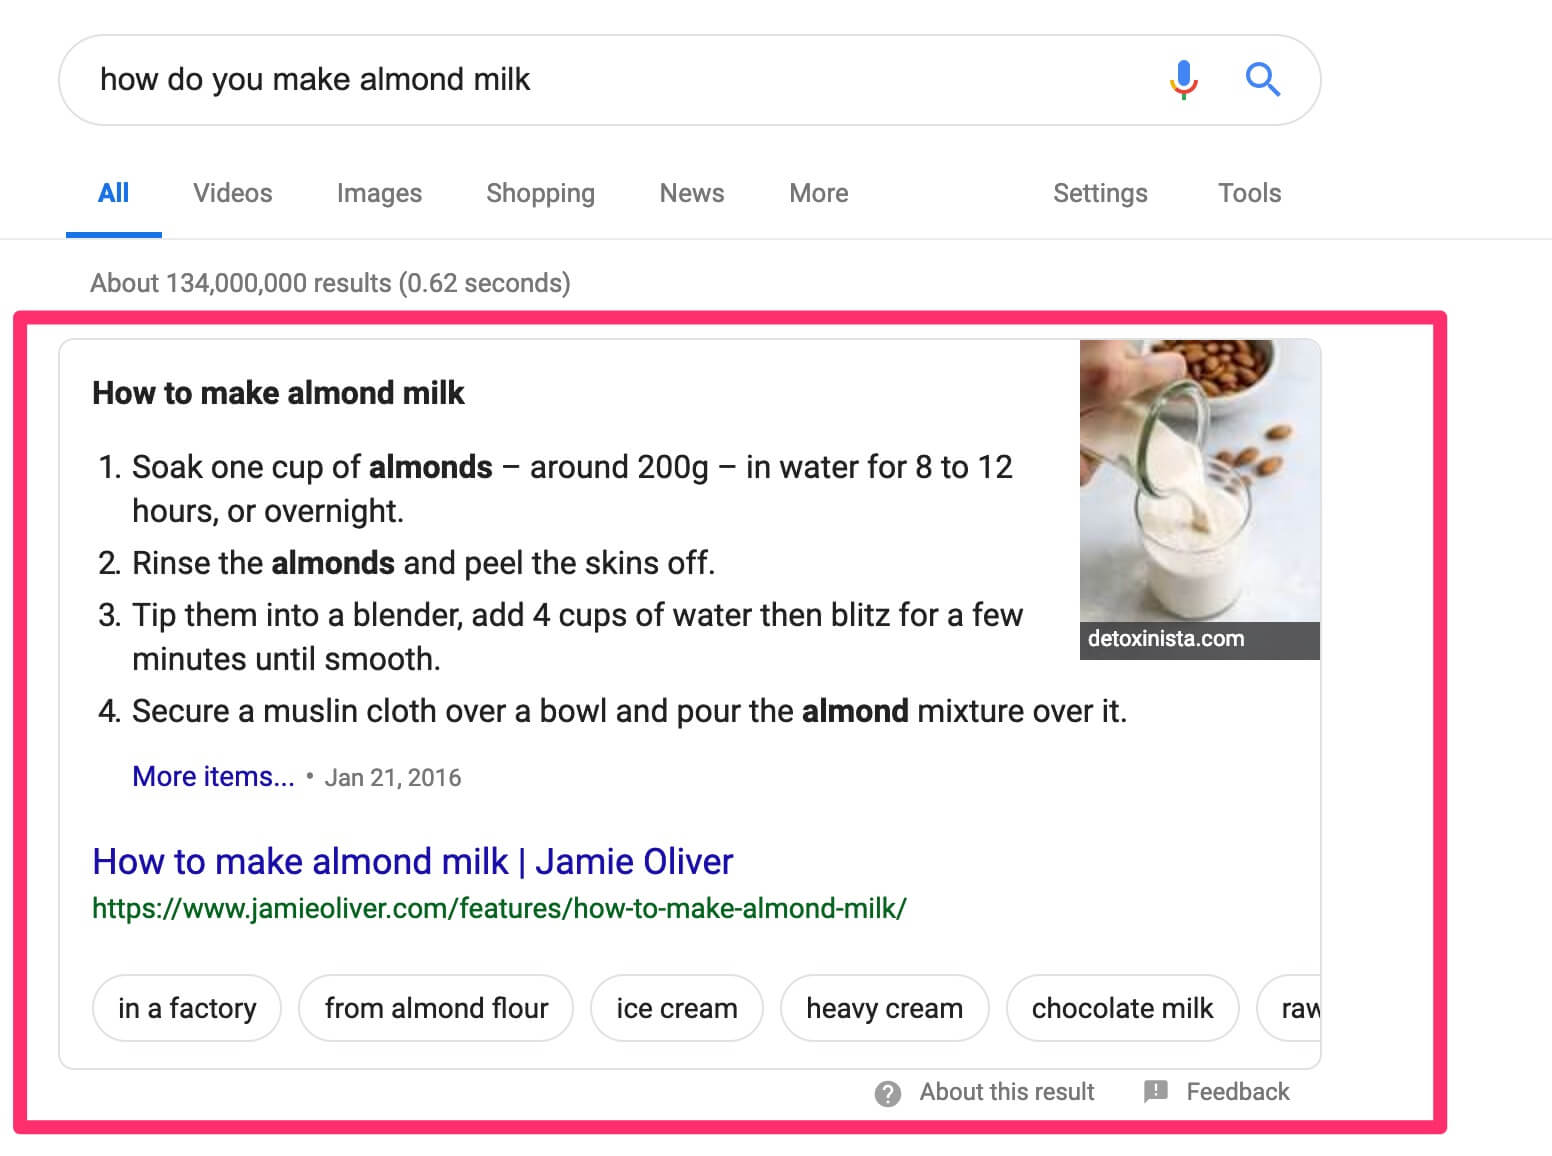
Google will actually help you out with featured snippets with two handy webmaster tools:
- Markup Helper (implements Schema markup)
- Testing Tool (previewing your snippets)
If you want to learn more about getting a featured snippet, check out Robbie Richard’s post on how to get a featured snippet.
Add keywords to your image alt text.
In 2013, Google made a big change to their algorithm in regards to image search in that users could click an image (in Google Image Search) and open it without having to ever visit the website the image was hosted on. That’s bad news for SEO.
Long story short, Getty Images filed a complaint claiming that Google was enabling image piracy while also stifling site traffic. So in 2018, Google updated its algorithm to send image searches to landing pages rather than the images themselves.
This means you can get organic site traffic from your images as well as your body copy.
To add an image description in WordPress, navigate to Media and select an image. When the box appears, simply enter in your keywords to the alt text box, like so:
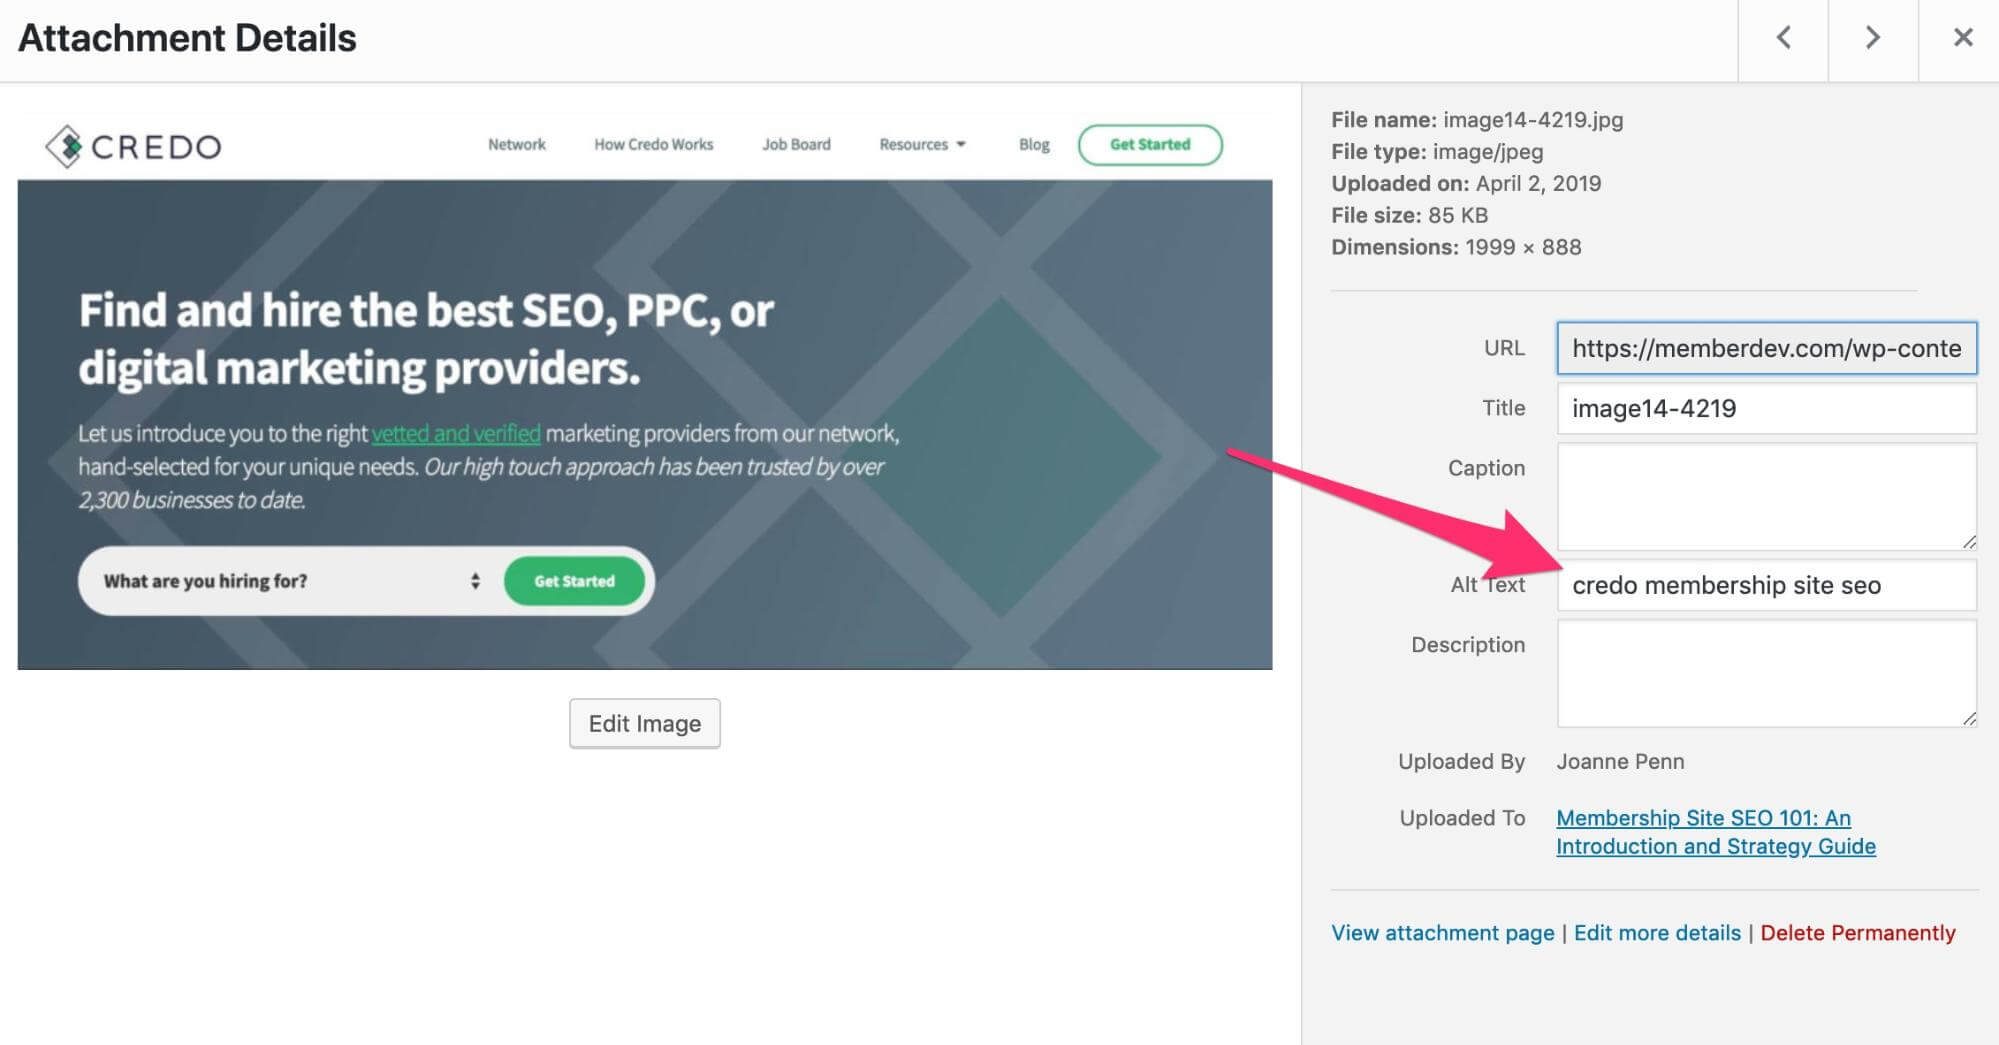
Here are a few tips to remember for image descriptions:
- Choose one or two high-value keywords or a semantic search phrase.
- Keep keywords short (no keyword stuffing here either).
- Make sure your keywords appear on the landing page where the image is linked.
If you want to learn more about adding alt text to images, check out Moz’s alt text guide.
So, putting it all together here’s what an SEO optimized landing should look like:
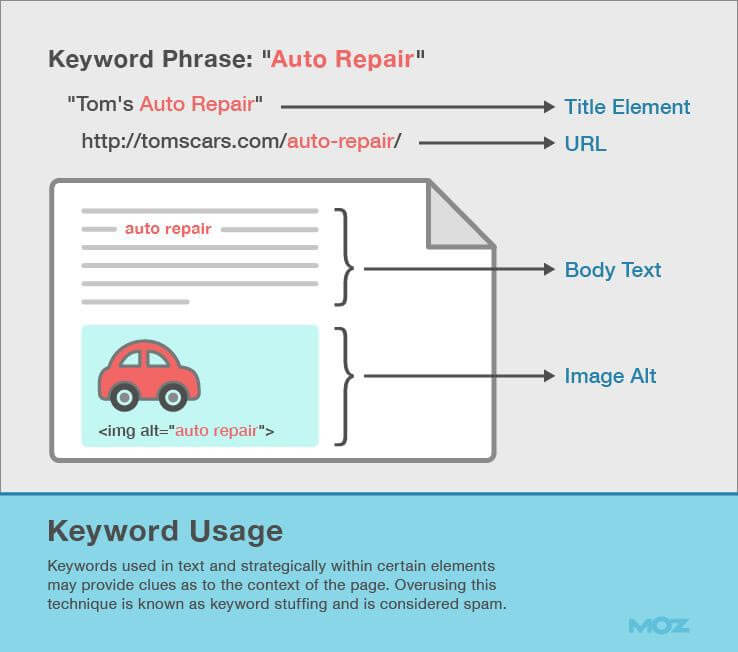
And there you have it. Optimized site content!
Final Thoughts
There’s a lot to learn about SEO, certainly more than we’ve covered in this post! But having a basic understanding of how to optimize your site will give you a leg up over the competition. Be sure to check out our previous post for some basic SEO rules and download our free guides for more tips.
Happy optimizing!


